Building the Tansu


This furniture piece started as a pile of redwood 1 x 4’s stacked on a job site I was working on. The redwood was going to be painted trim. When I looked at it, I discovered that it was very nice old growth wood with tight grain, which was becoming more and more rare. It seemed inappropriate to hide wood such as this, so I went through the pile and pulled out all the tight grain pieces and piled them separately. If we didn’t need to use them then we wouldn’t. I began imagining making a precious piece of furniture with these boards and it came to me that the tansu form was one that might be just the thing. I also liked the idea of creating a pleasing division of rectangles for the piece and using no more redwood than I had in my pile.
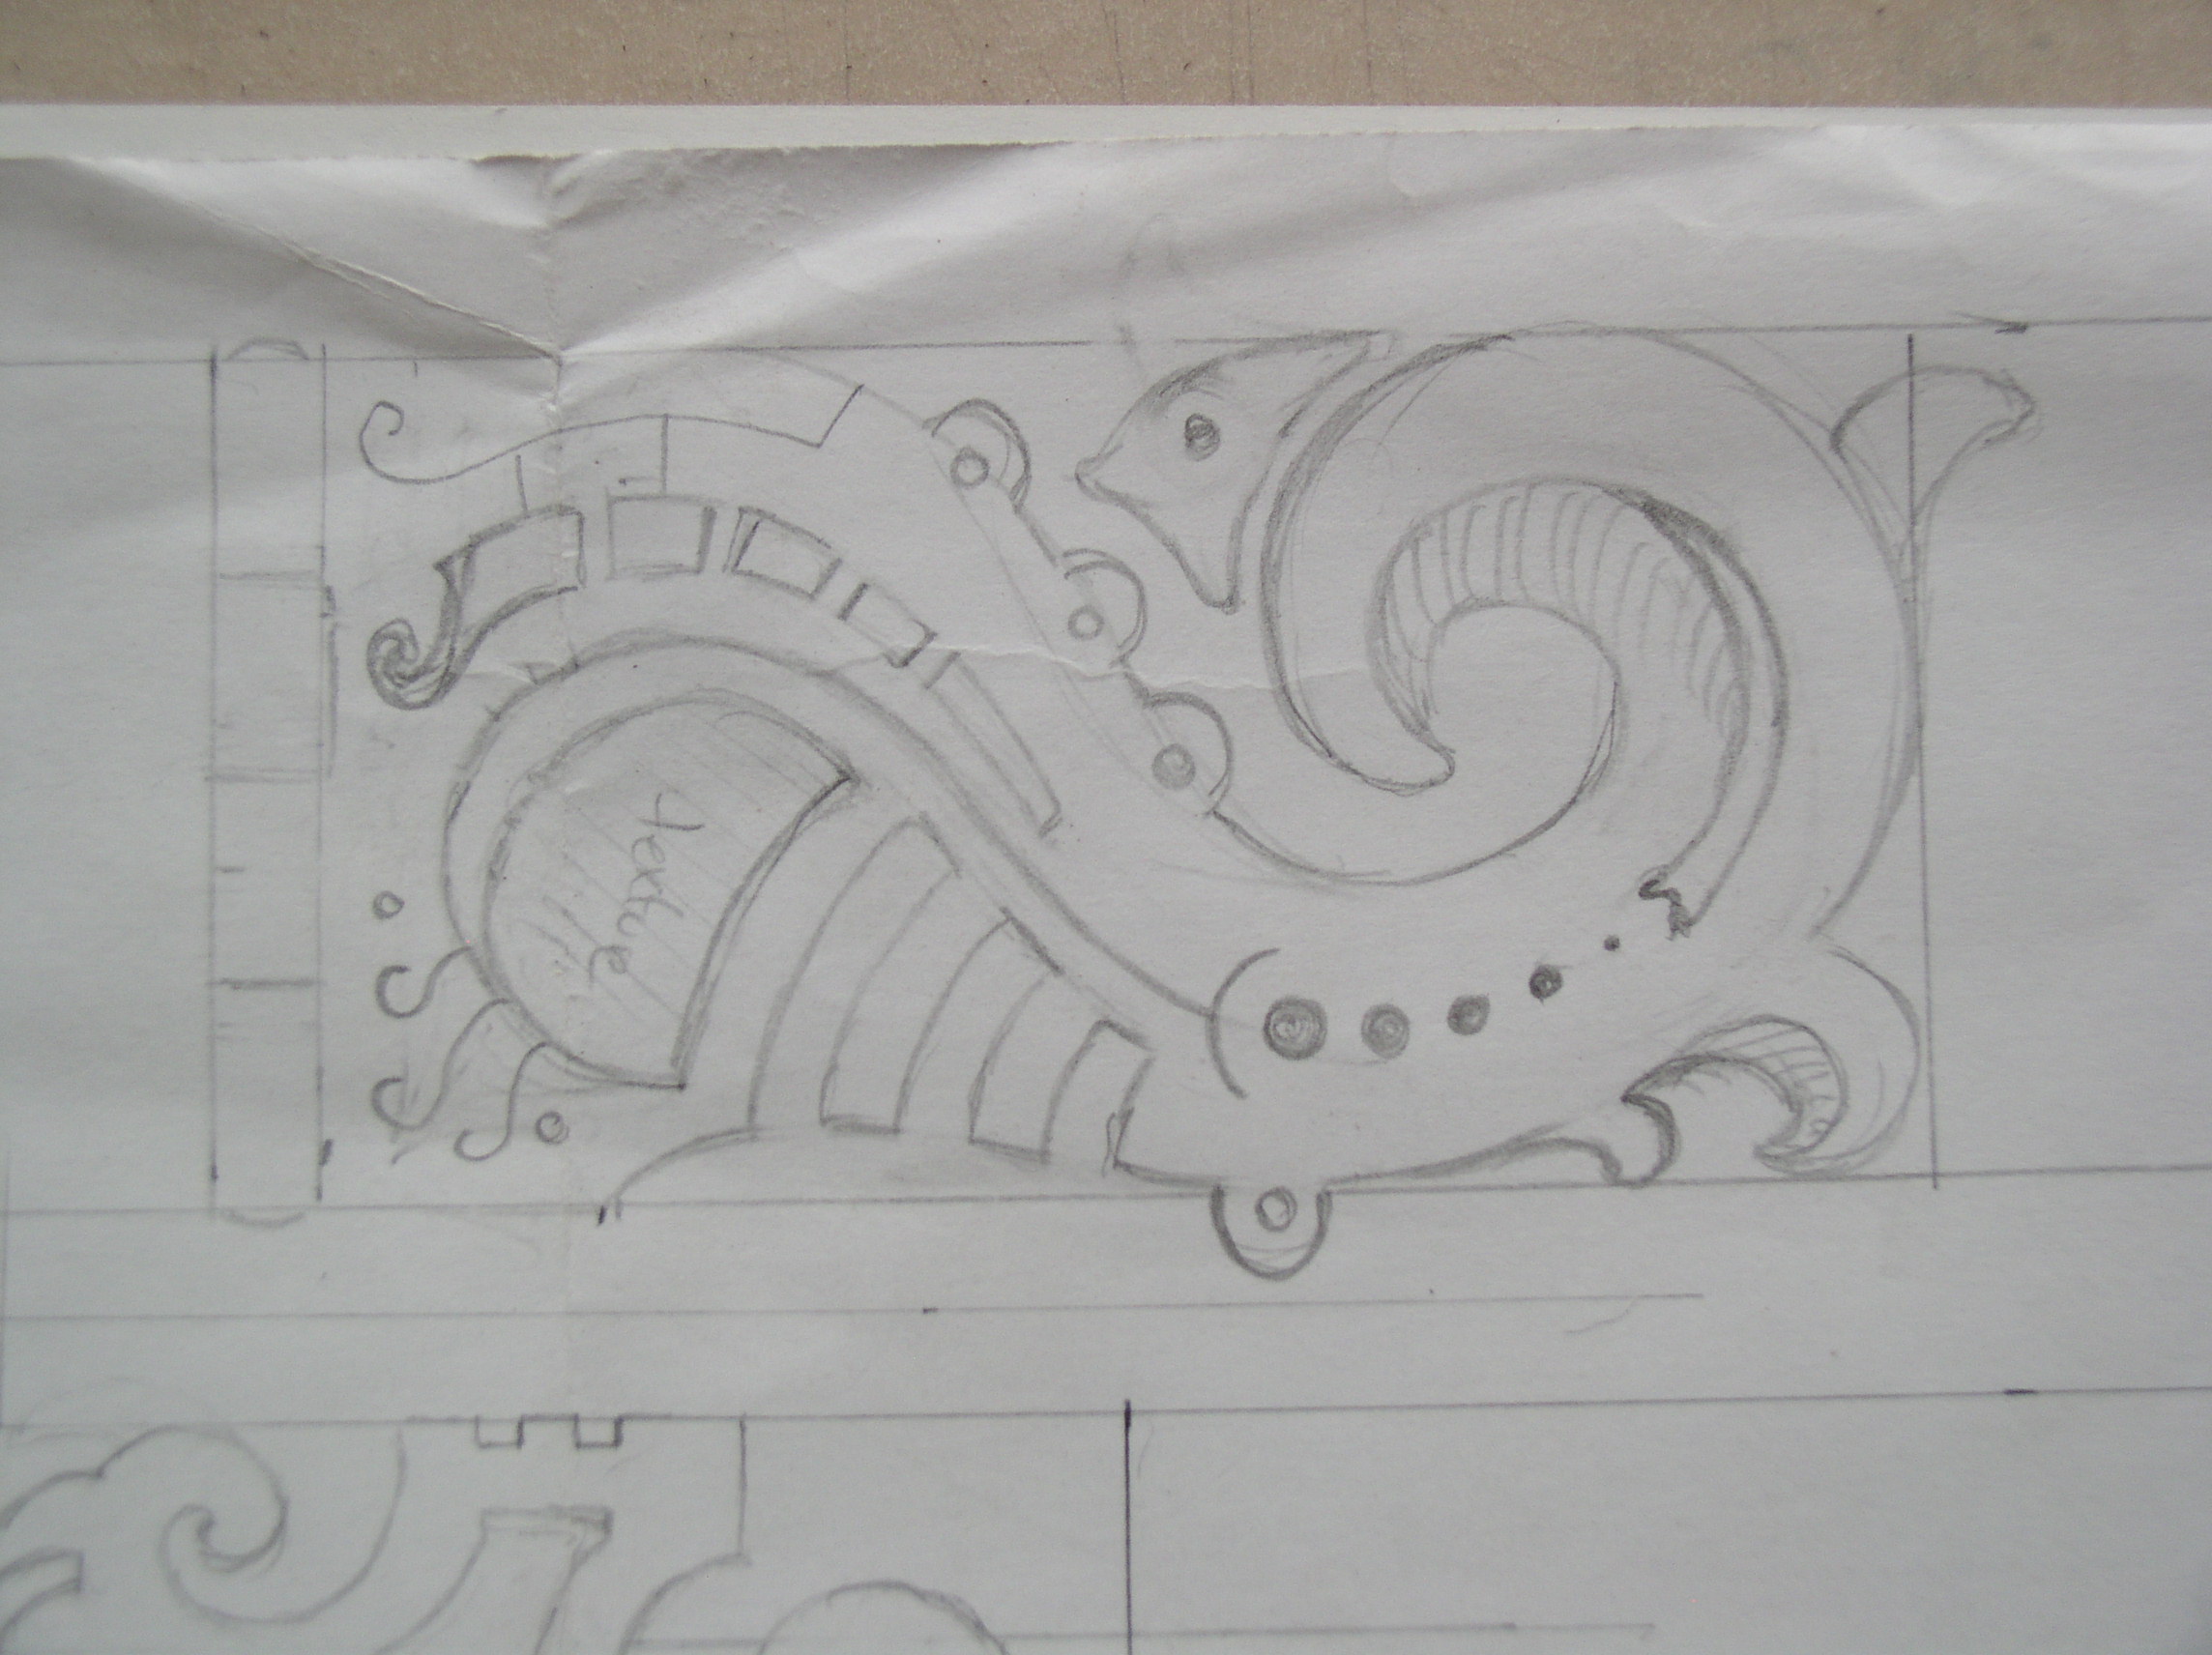
The project design was worked out after sketches on a pice of 1/4″ MDF until the proportion on the whole and the divisions for the drawers and doors was finalized.
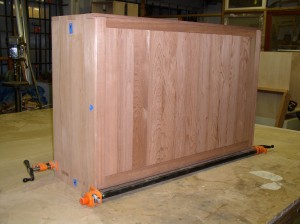
The Side panels were constructed with traditional tansu joinery, using alternating lapped joints at the top and through mortises and tenons on the bottom. The interior panels were joined using tapered sliding dovetail joints. The back is a framed panel of lap jointed redwood in a dado in the back of the carcass.
The legs are a separate assembly using walnut that will get ebonite with black aniline dye. The joinery is thru mortises. The bottom of the cabinet side panels rests in a grove in the top of the leg assembly with a positioning pin on each side.
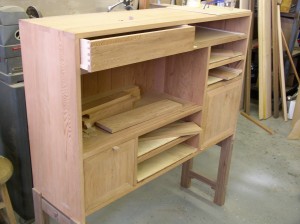
The drawers got hand cut half blind dovetails at the front and standard dovetails for the back joints. The sides and back of the drawers were made of 3/8″ maple.

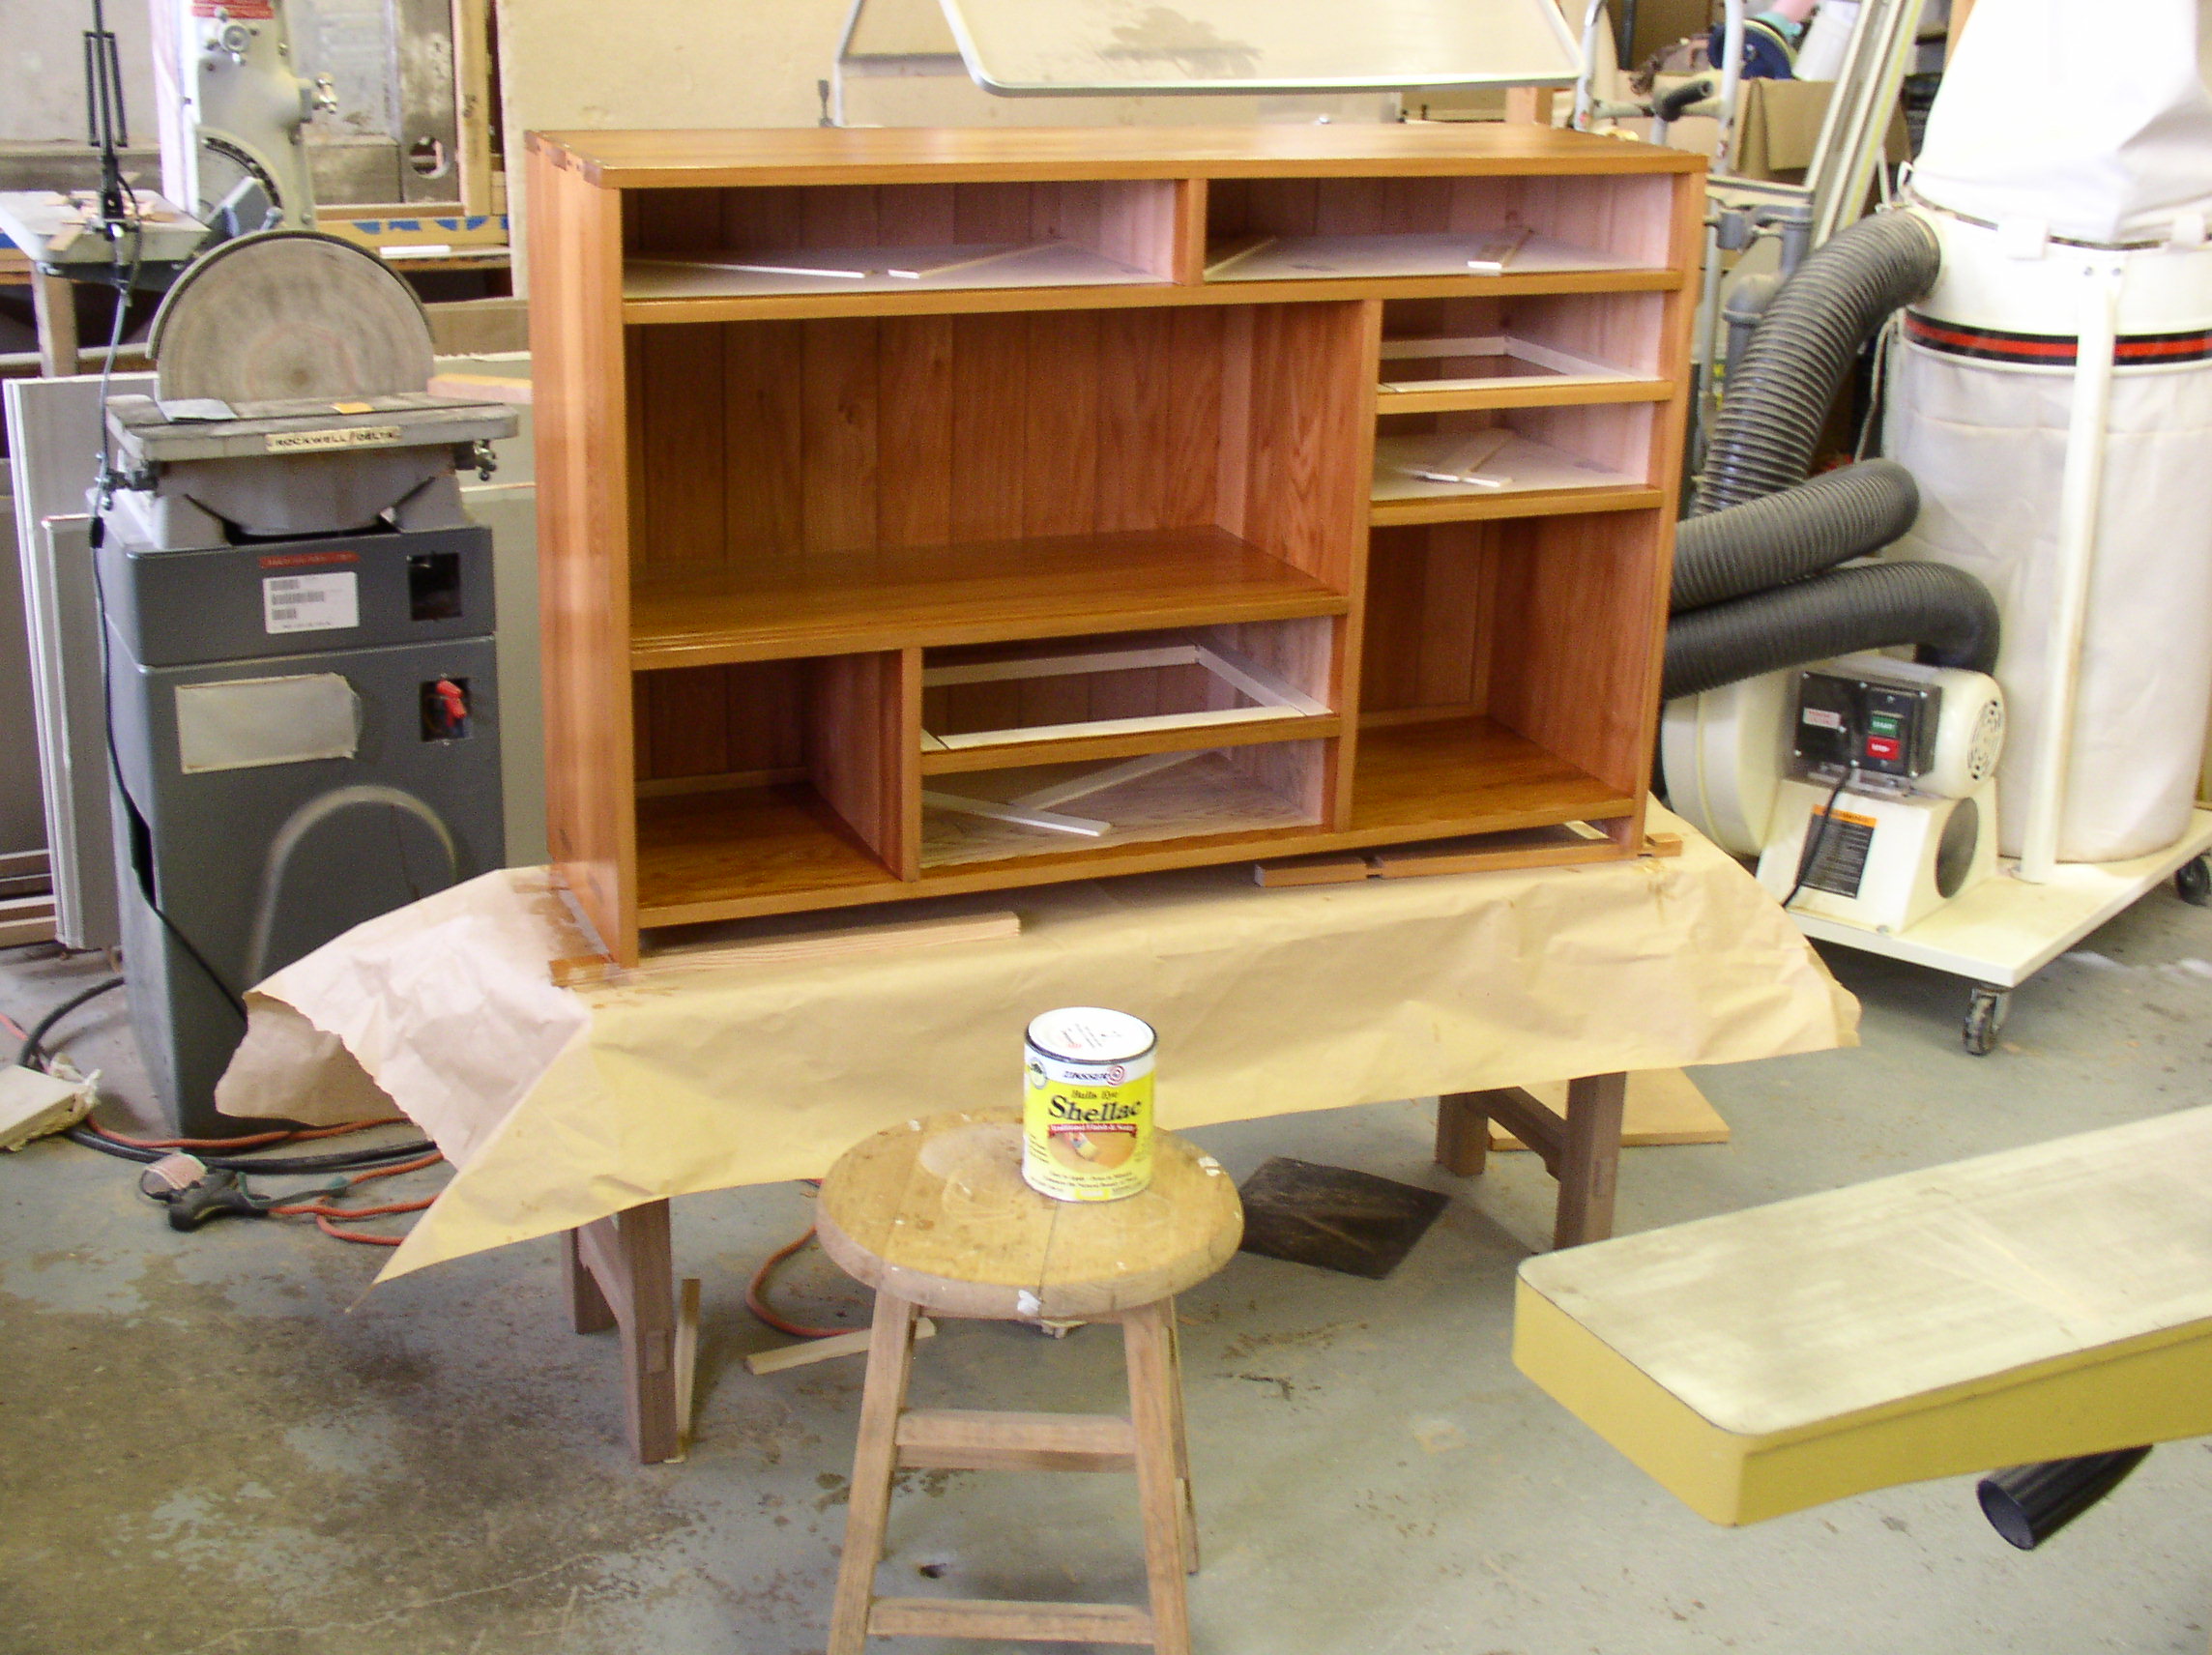
Once the carcass was assembled it got a light wash of an orange aniline dye and then many coats of shellac and the base got ebonized with black aniline dye.

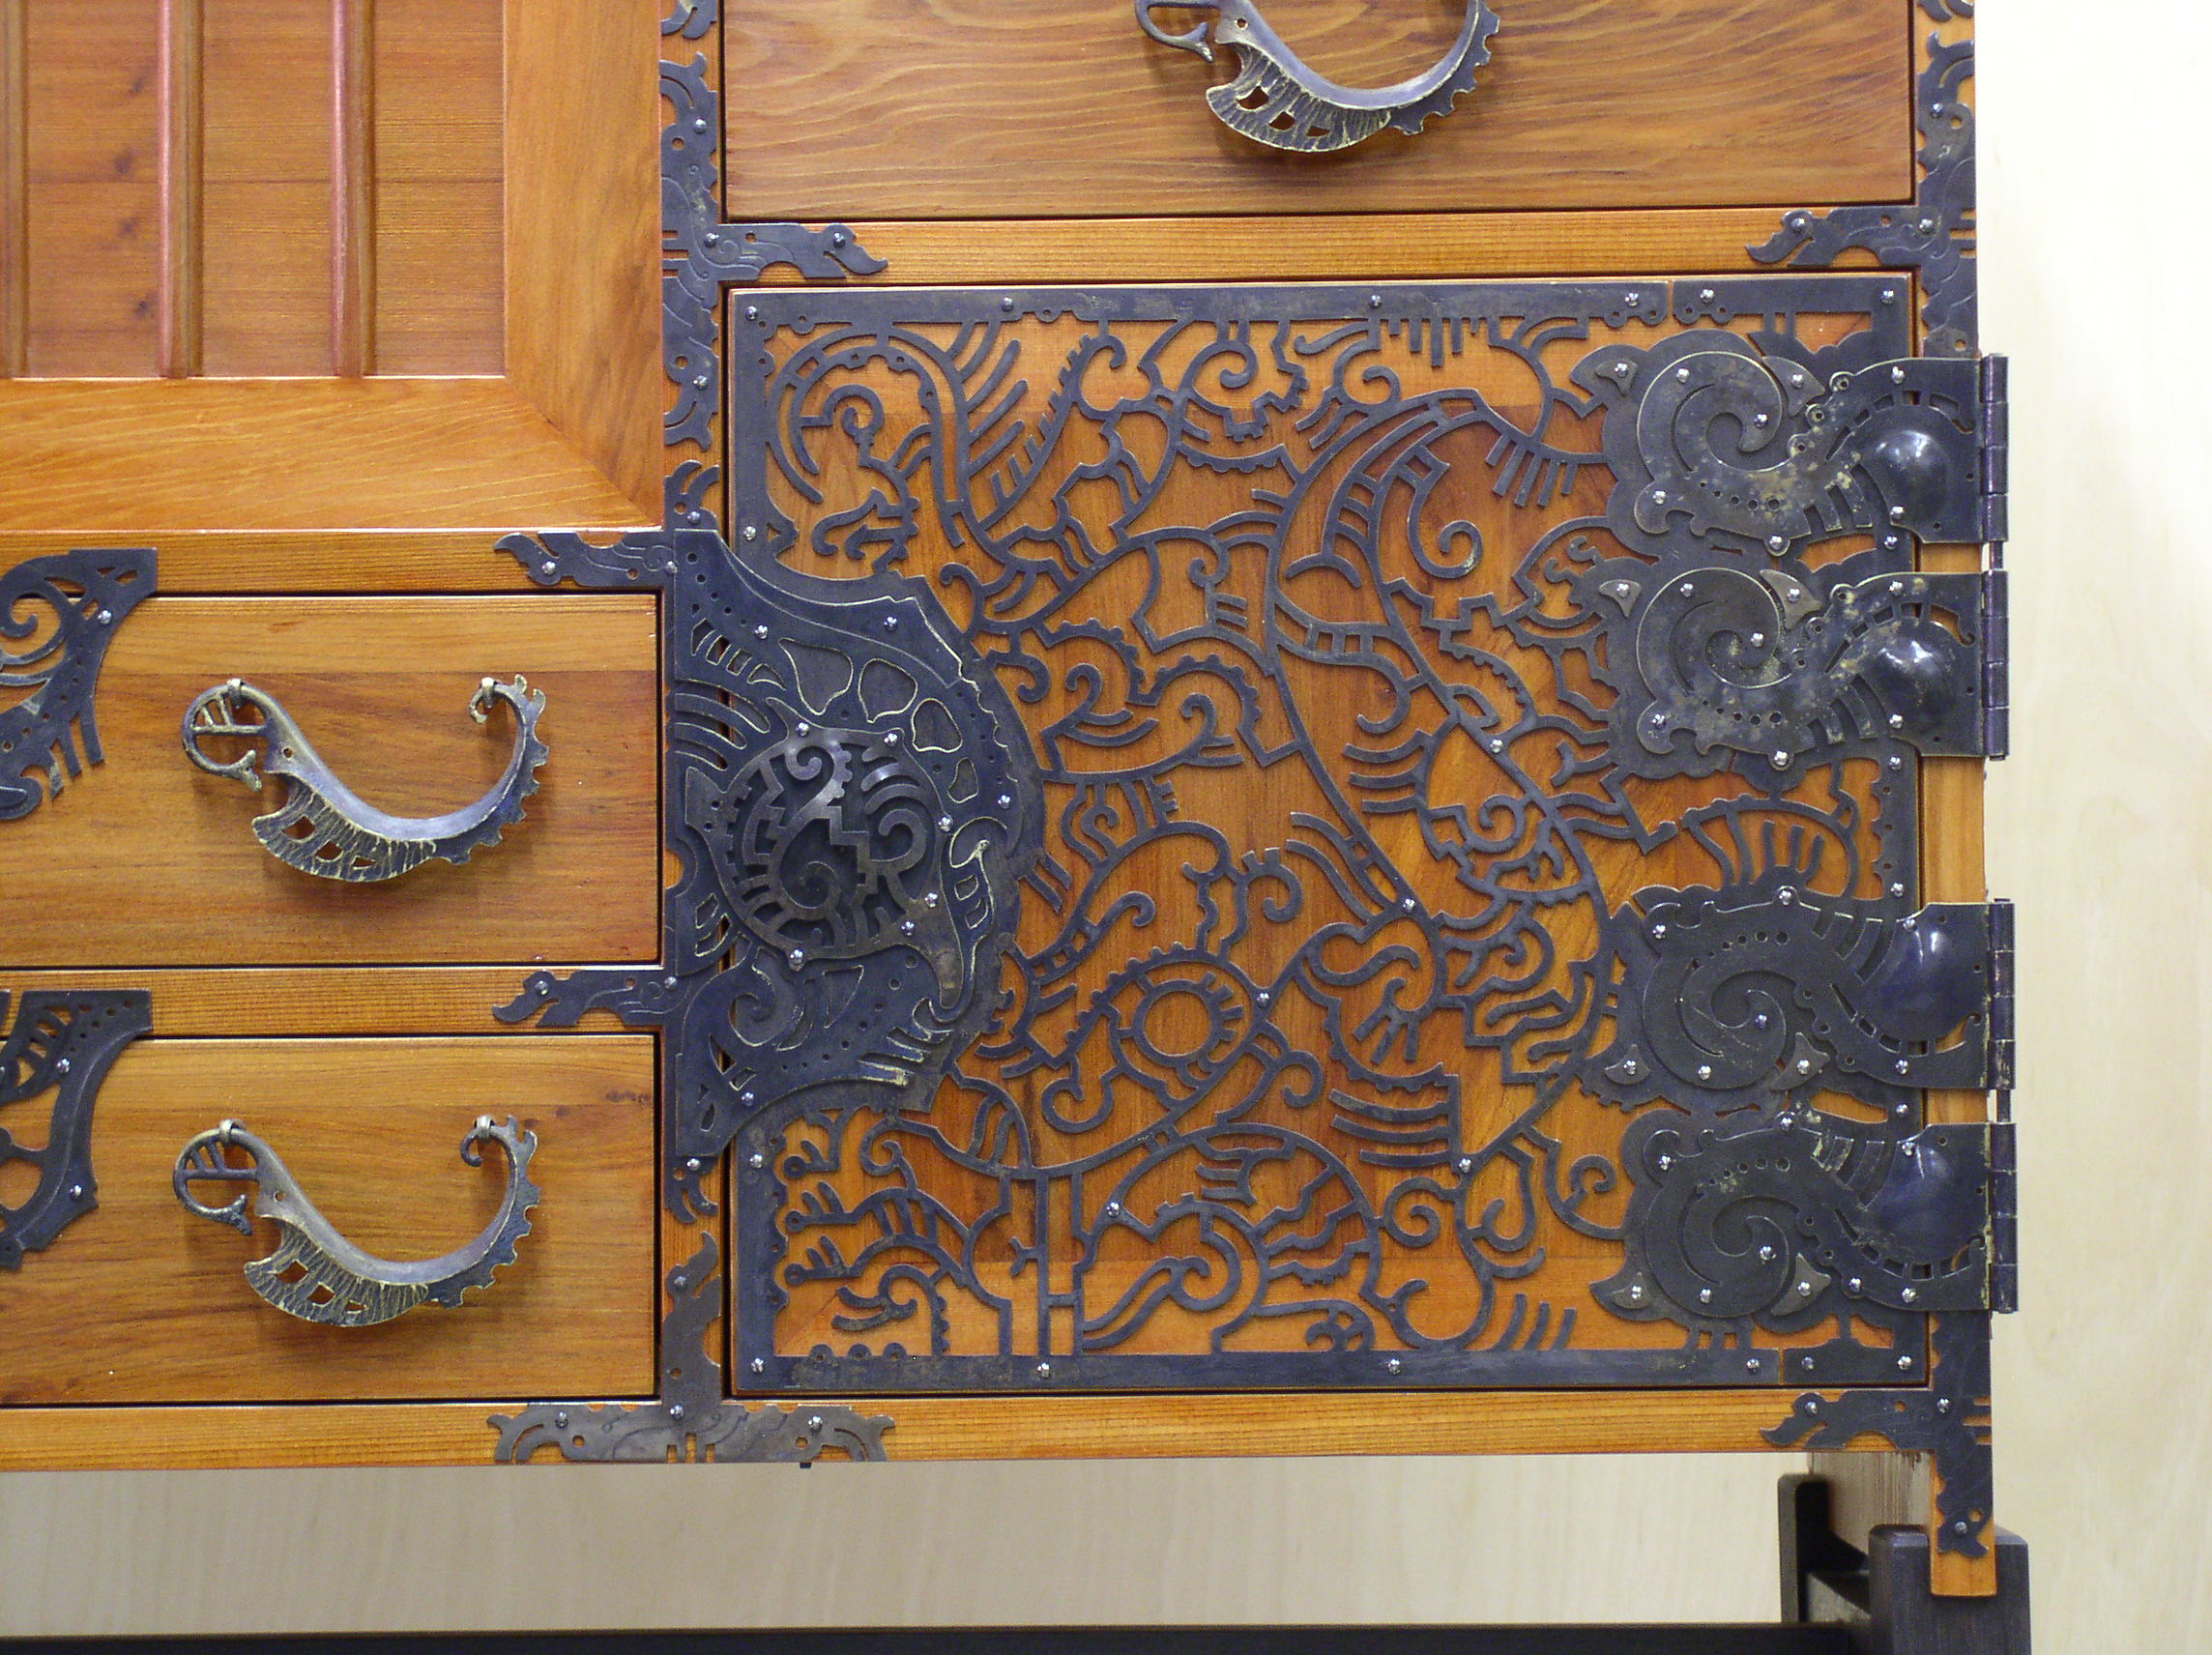
Once the carcass was constructed I started designing and making the hardware. The traditional tansu hardware that you can find in catalogs and in stores is very limited in design, although if you look into the history of tansu furniture pieces you will find an amazing range of hardware. The traditional hardware was iron, which was a whole other learning curve and a need for a lot of new tools and forge equipment. That being unlikely at this point, I stuck with what I knew something about, which was working with brass.
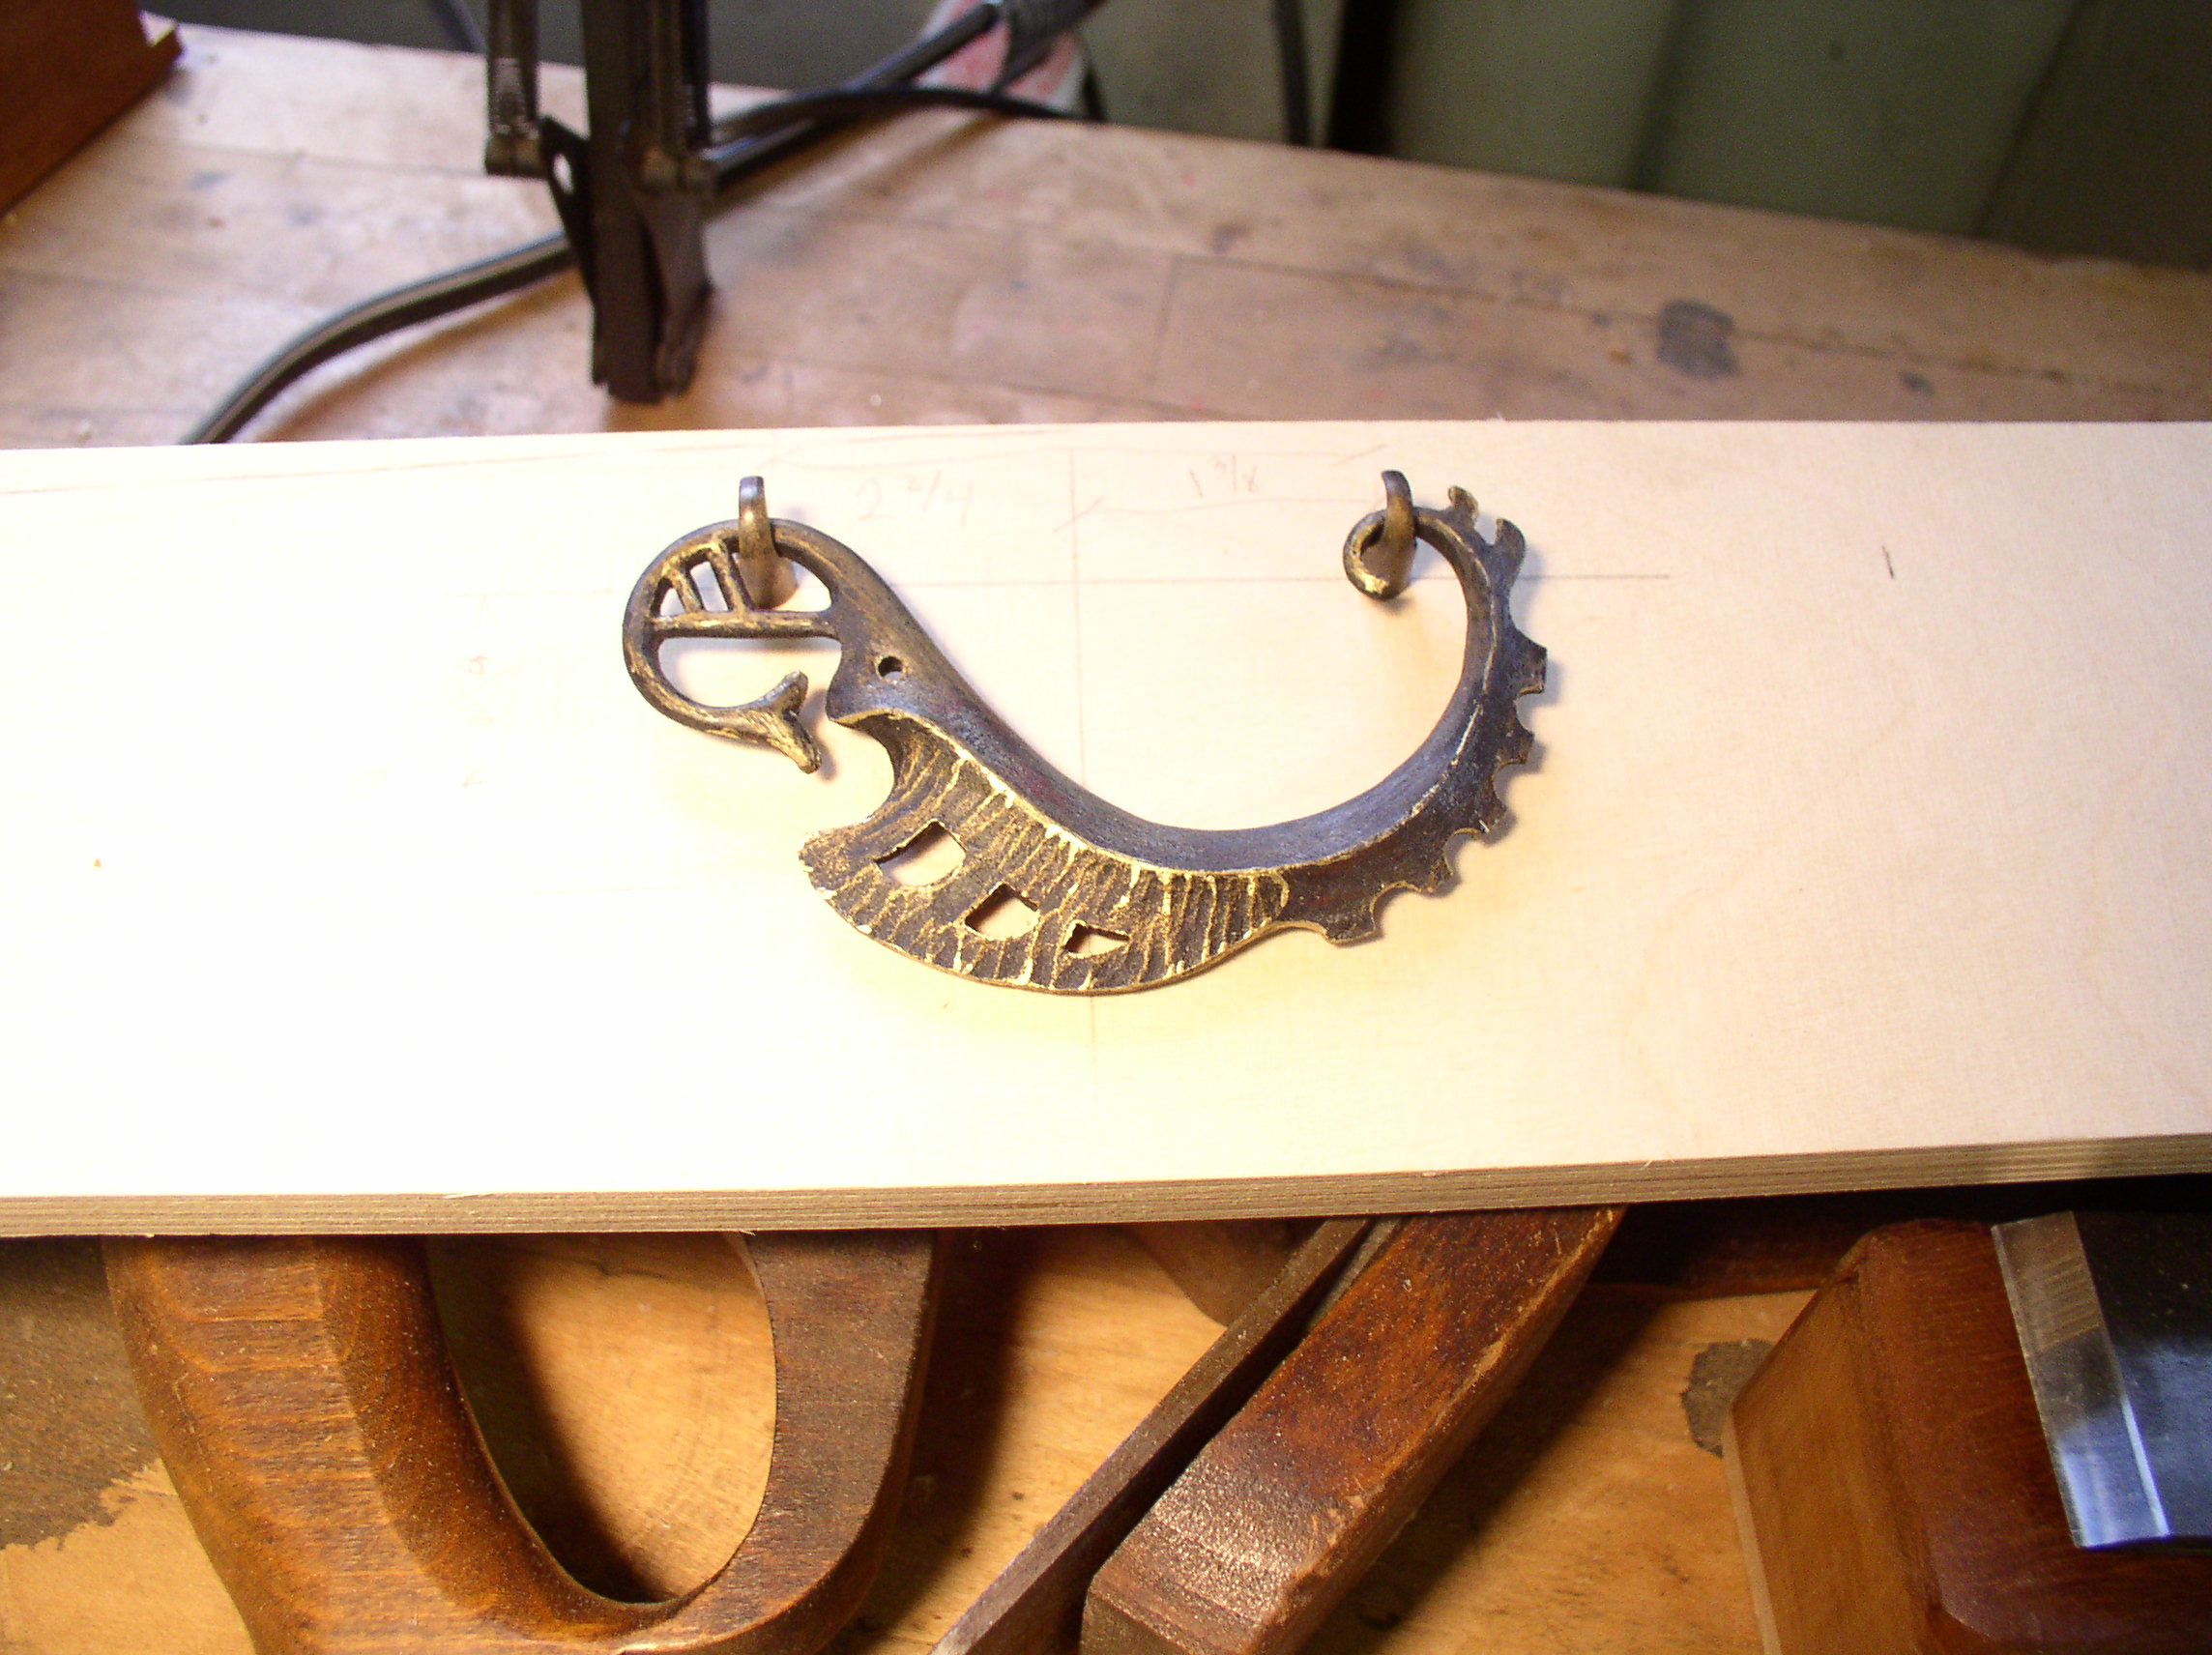
Using the full sized drawing I started to play with hardware ideas. I made most of the pieces using sheets of brass, but when it came to the handles I decided to use my shop partner’s metal expertise and make masters, then have them cast at a foundry.
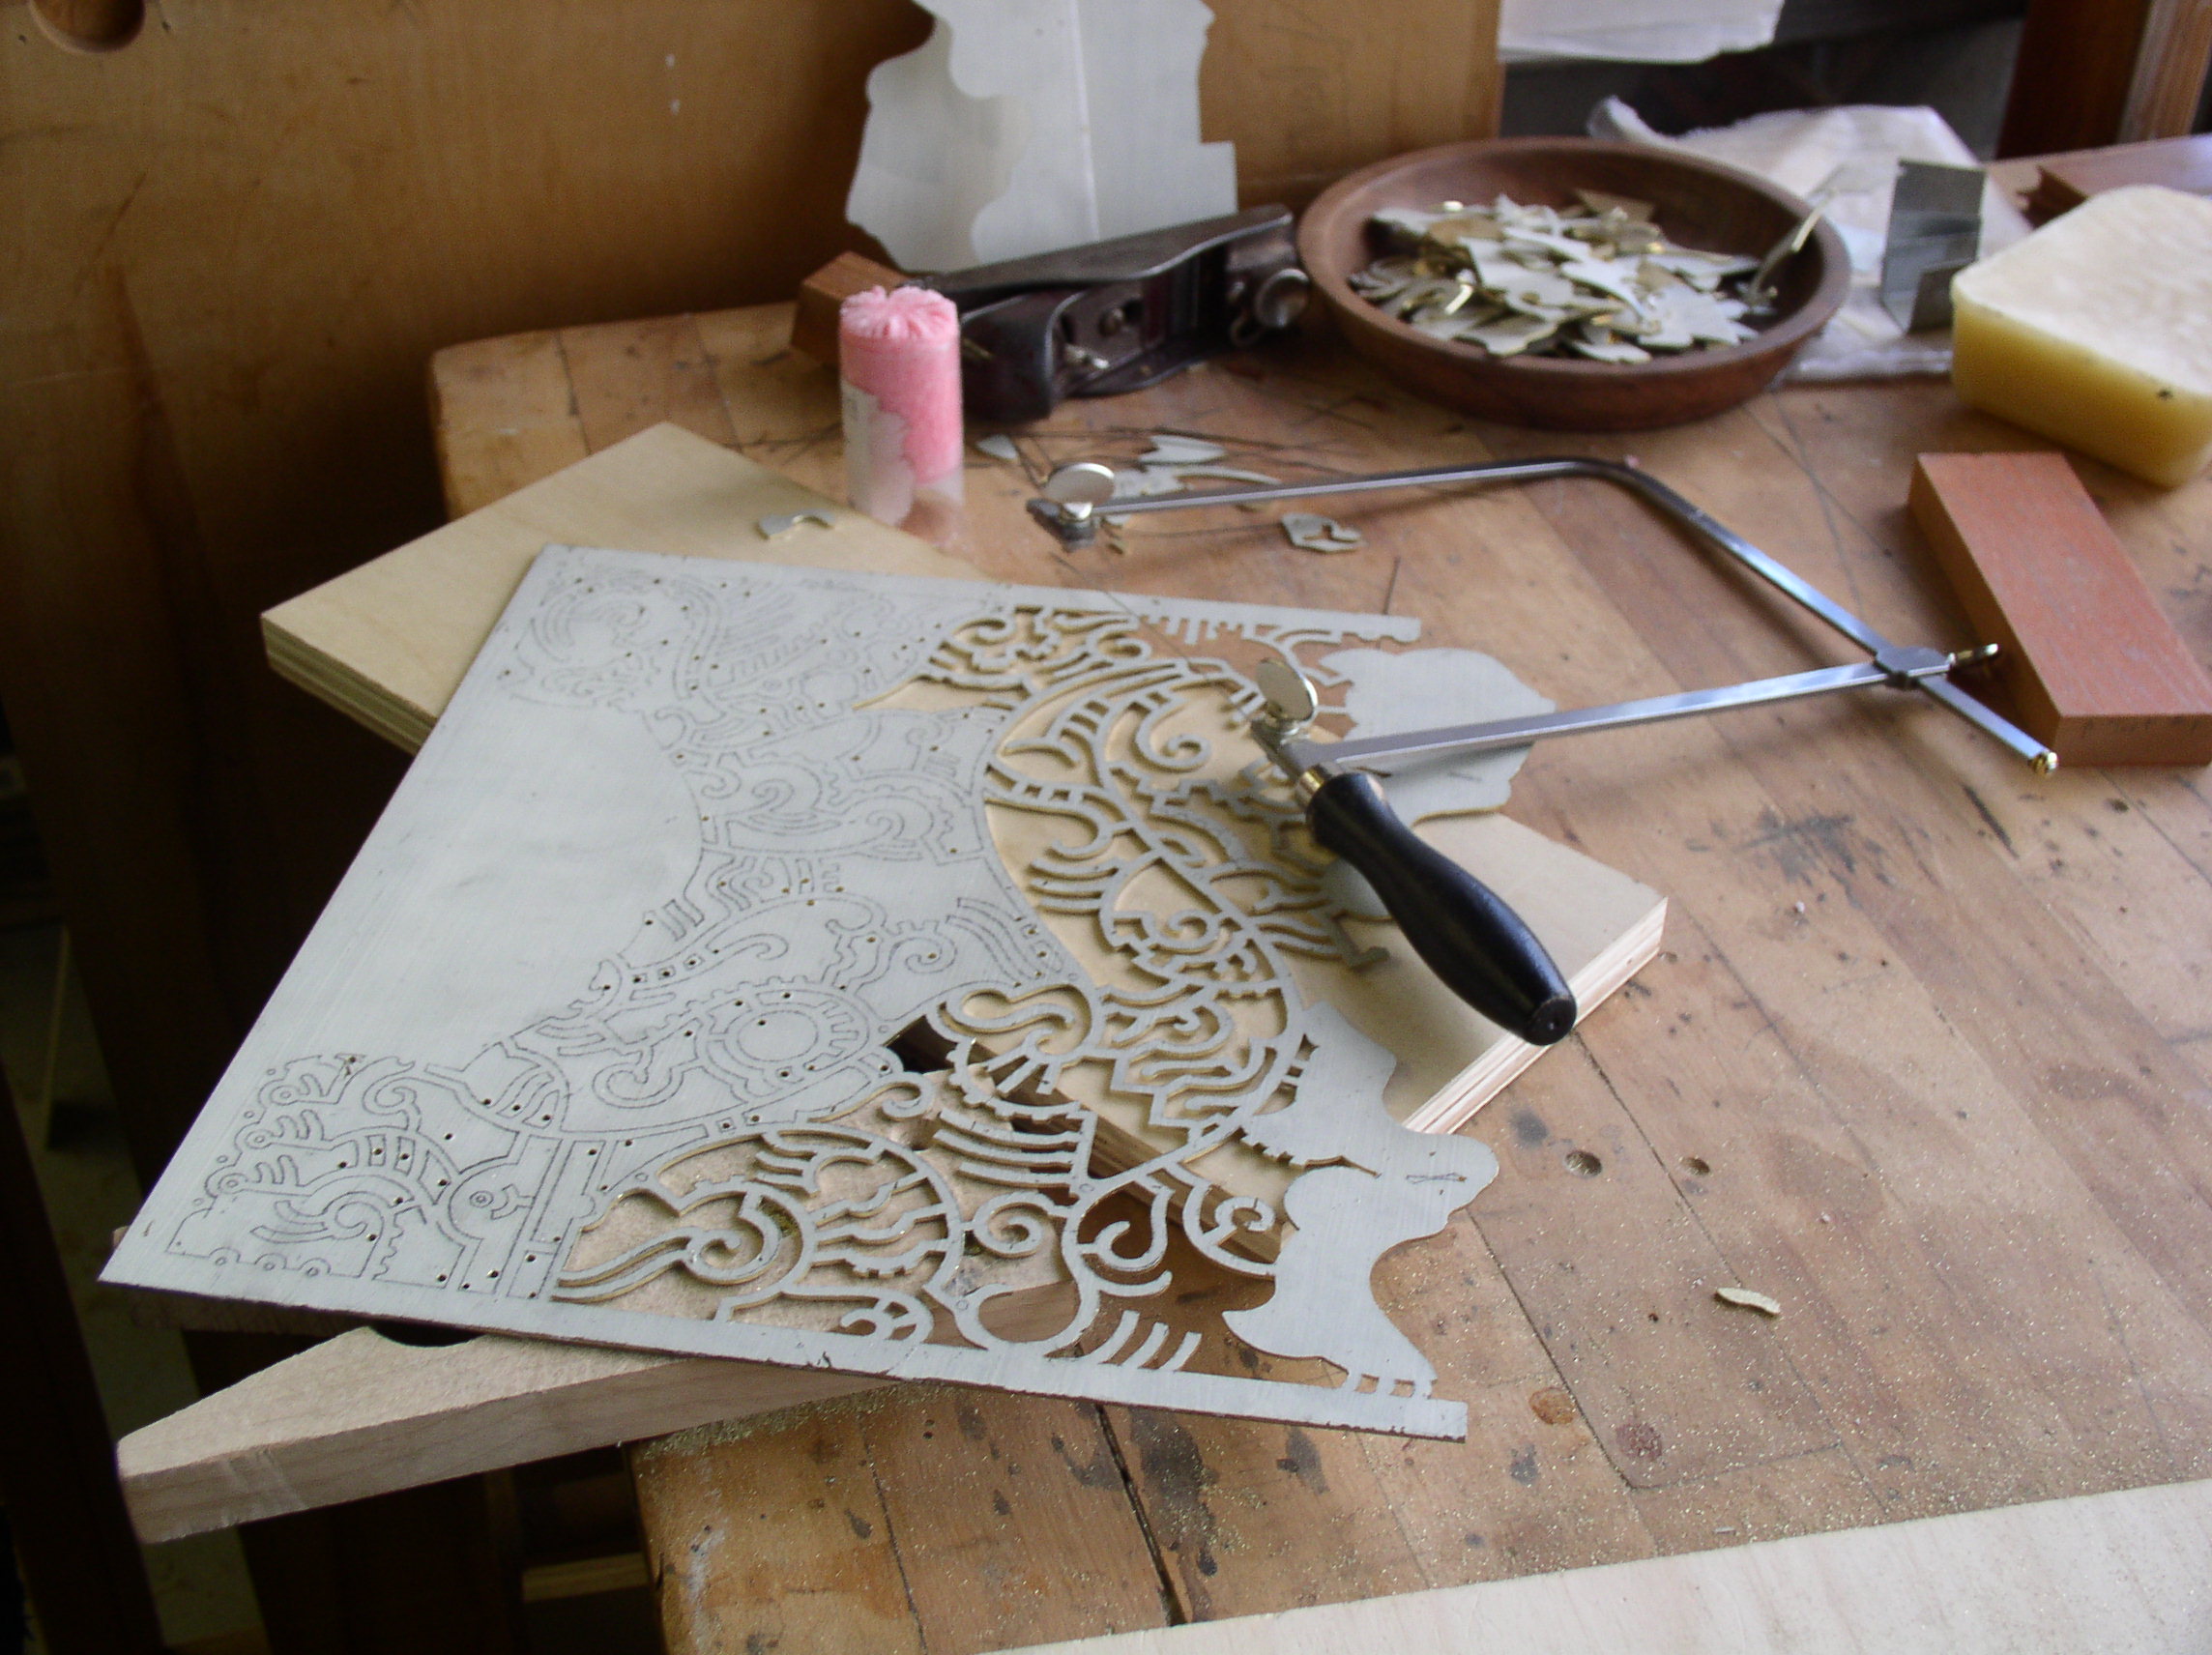
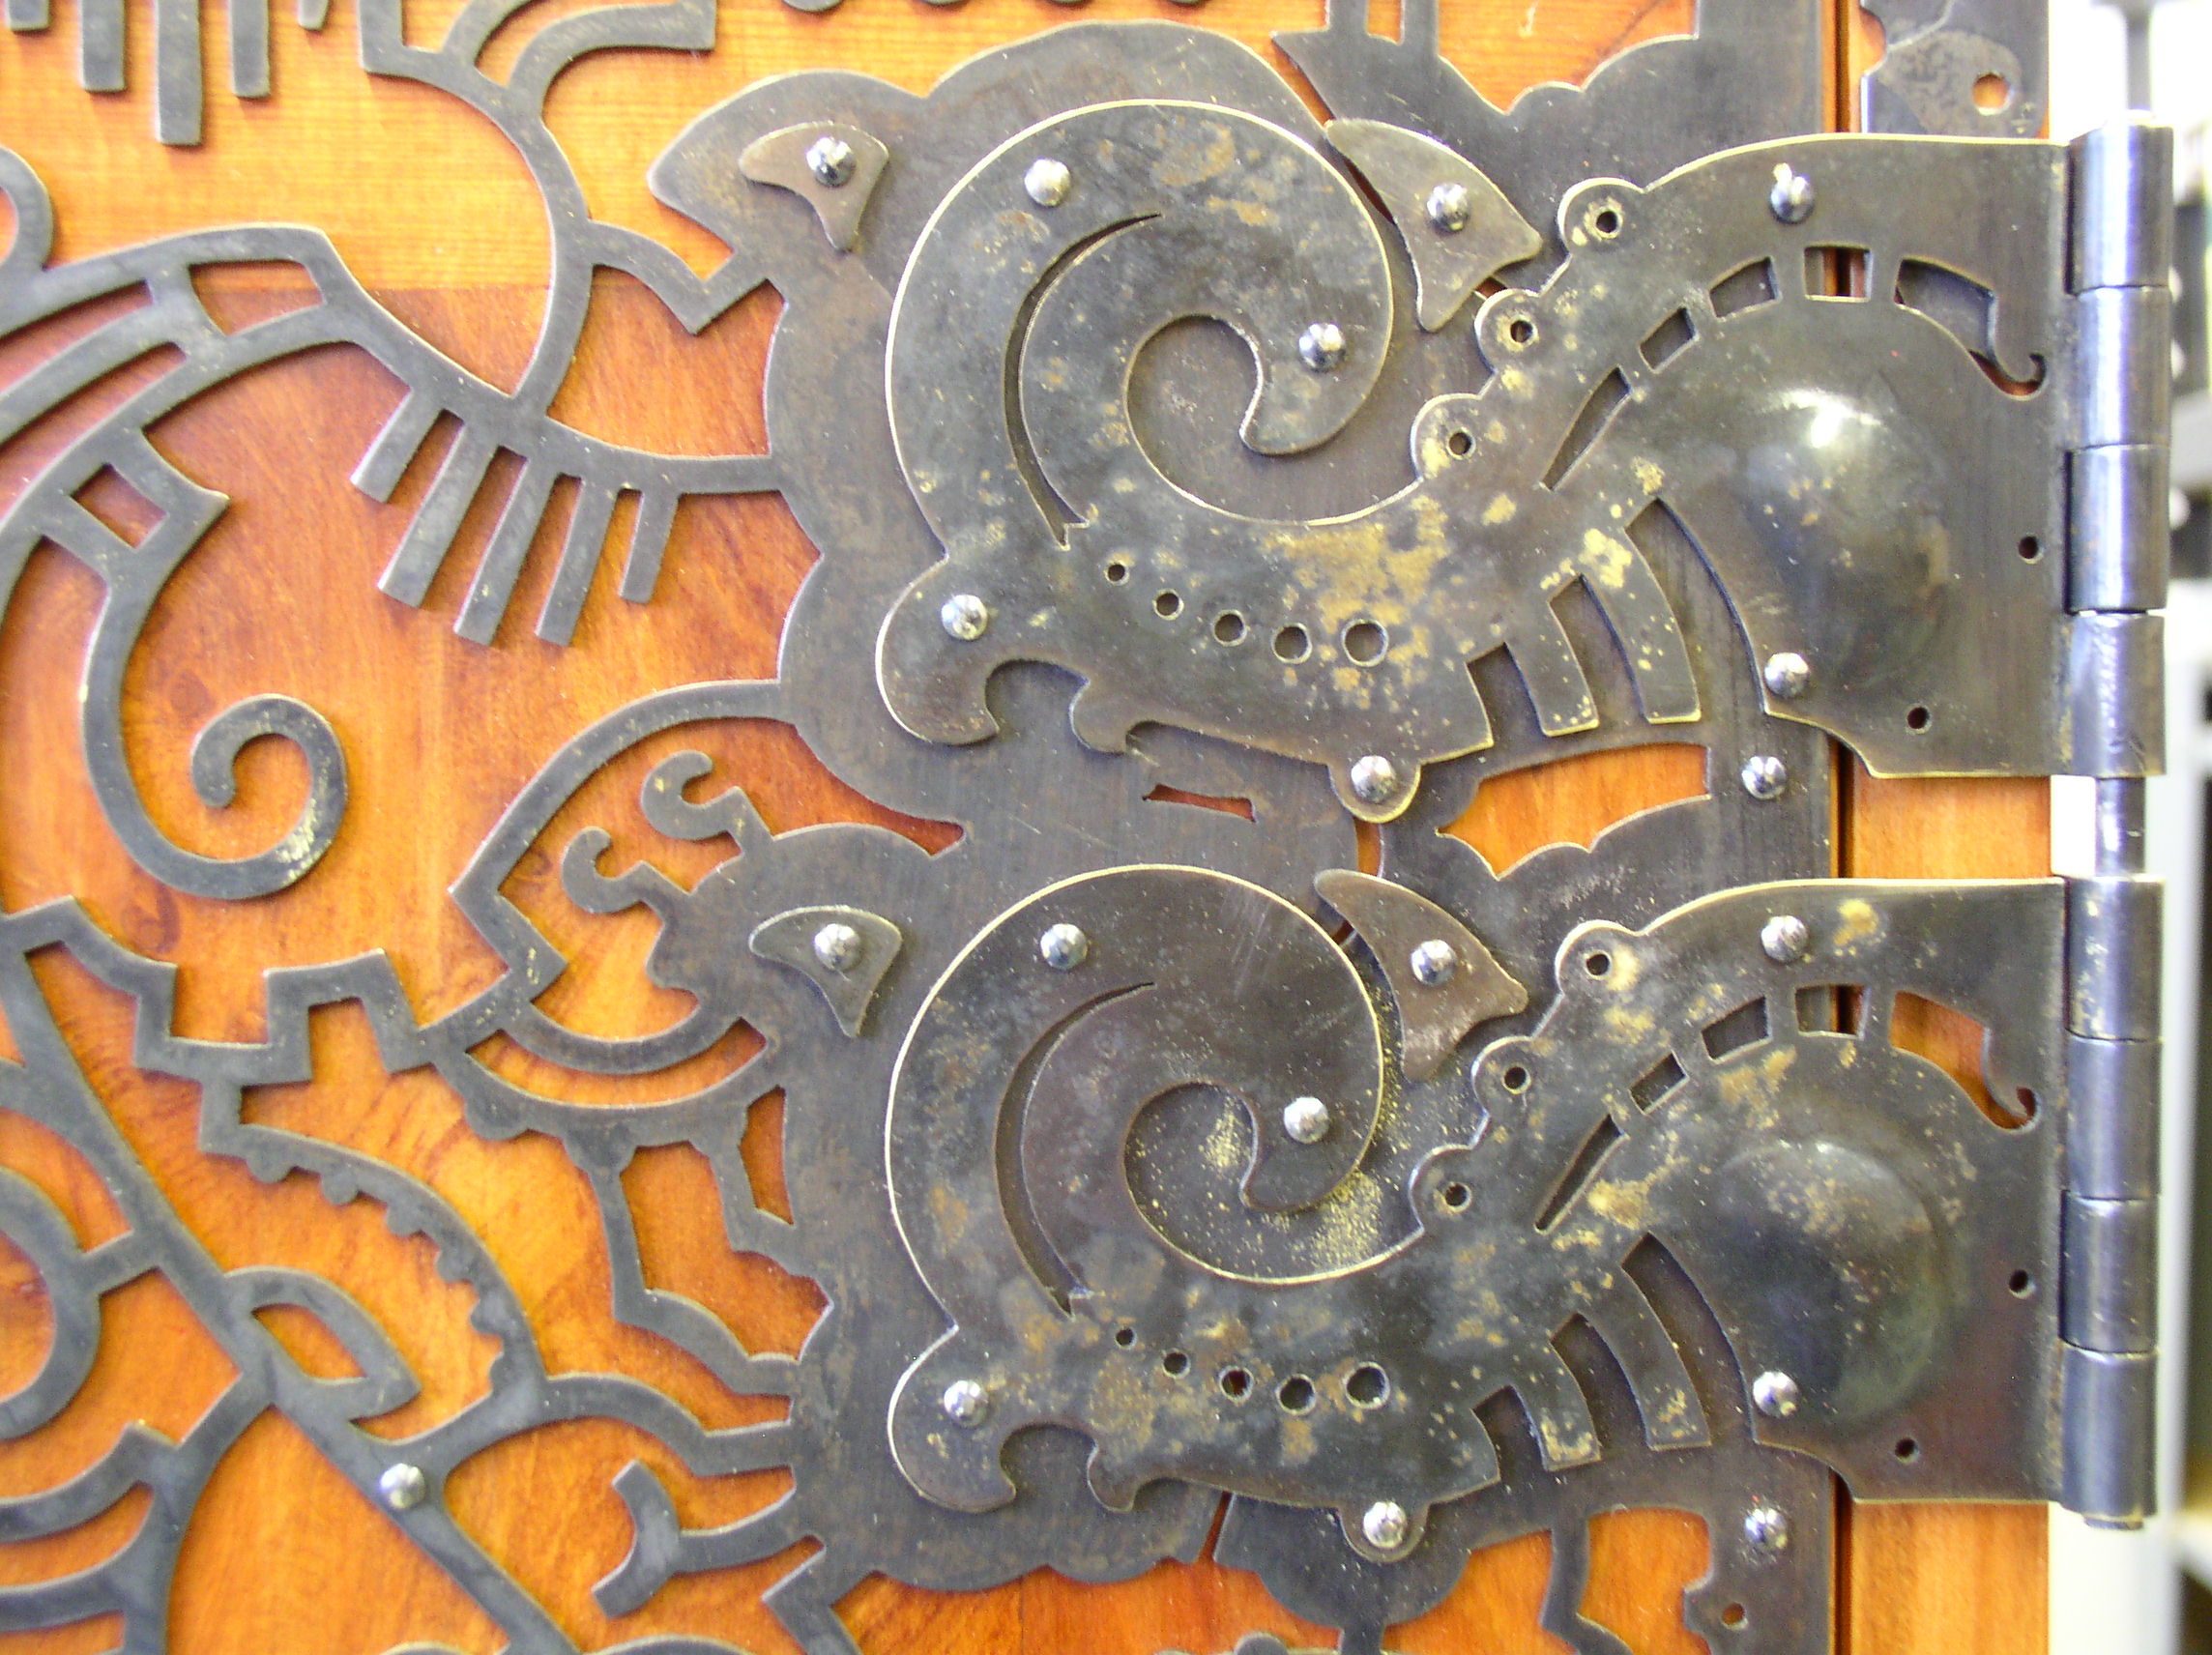
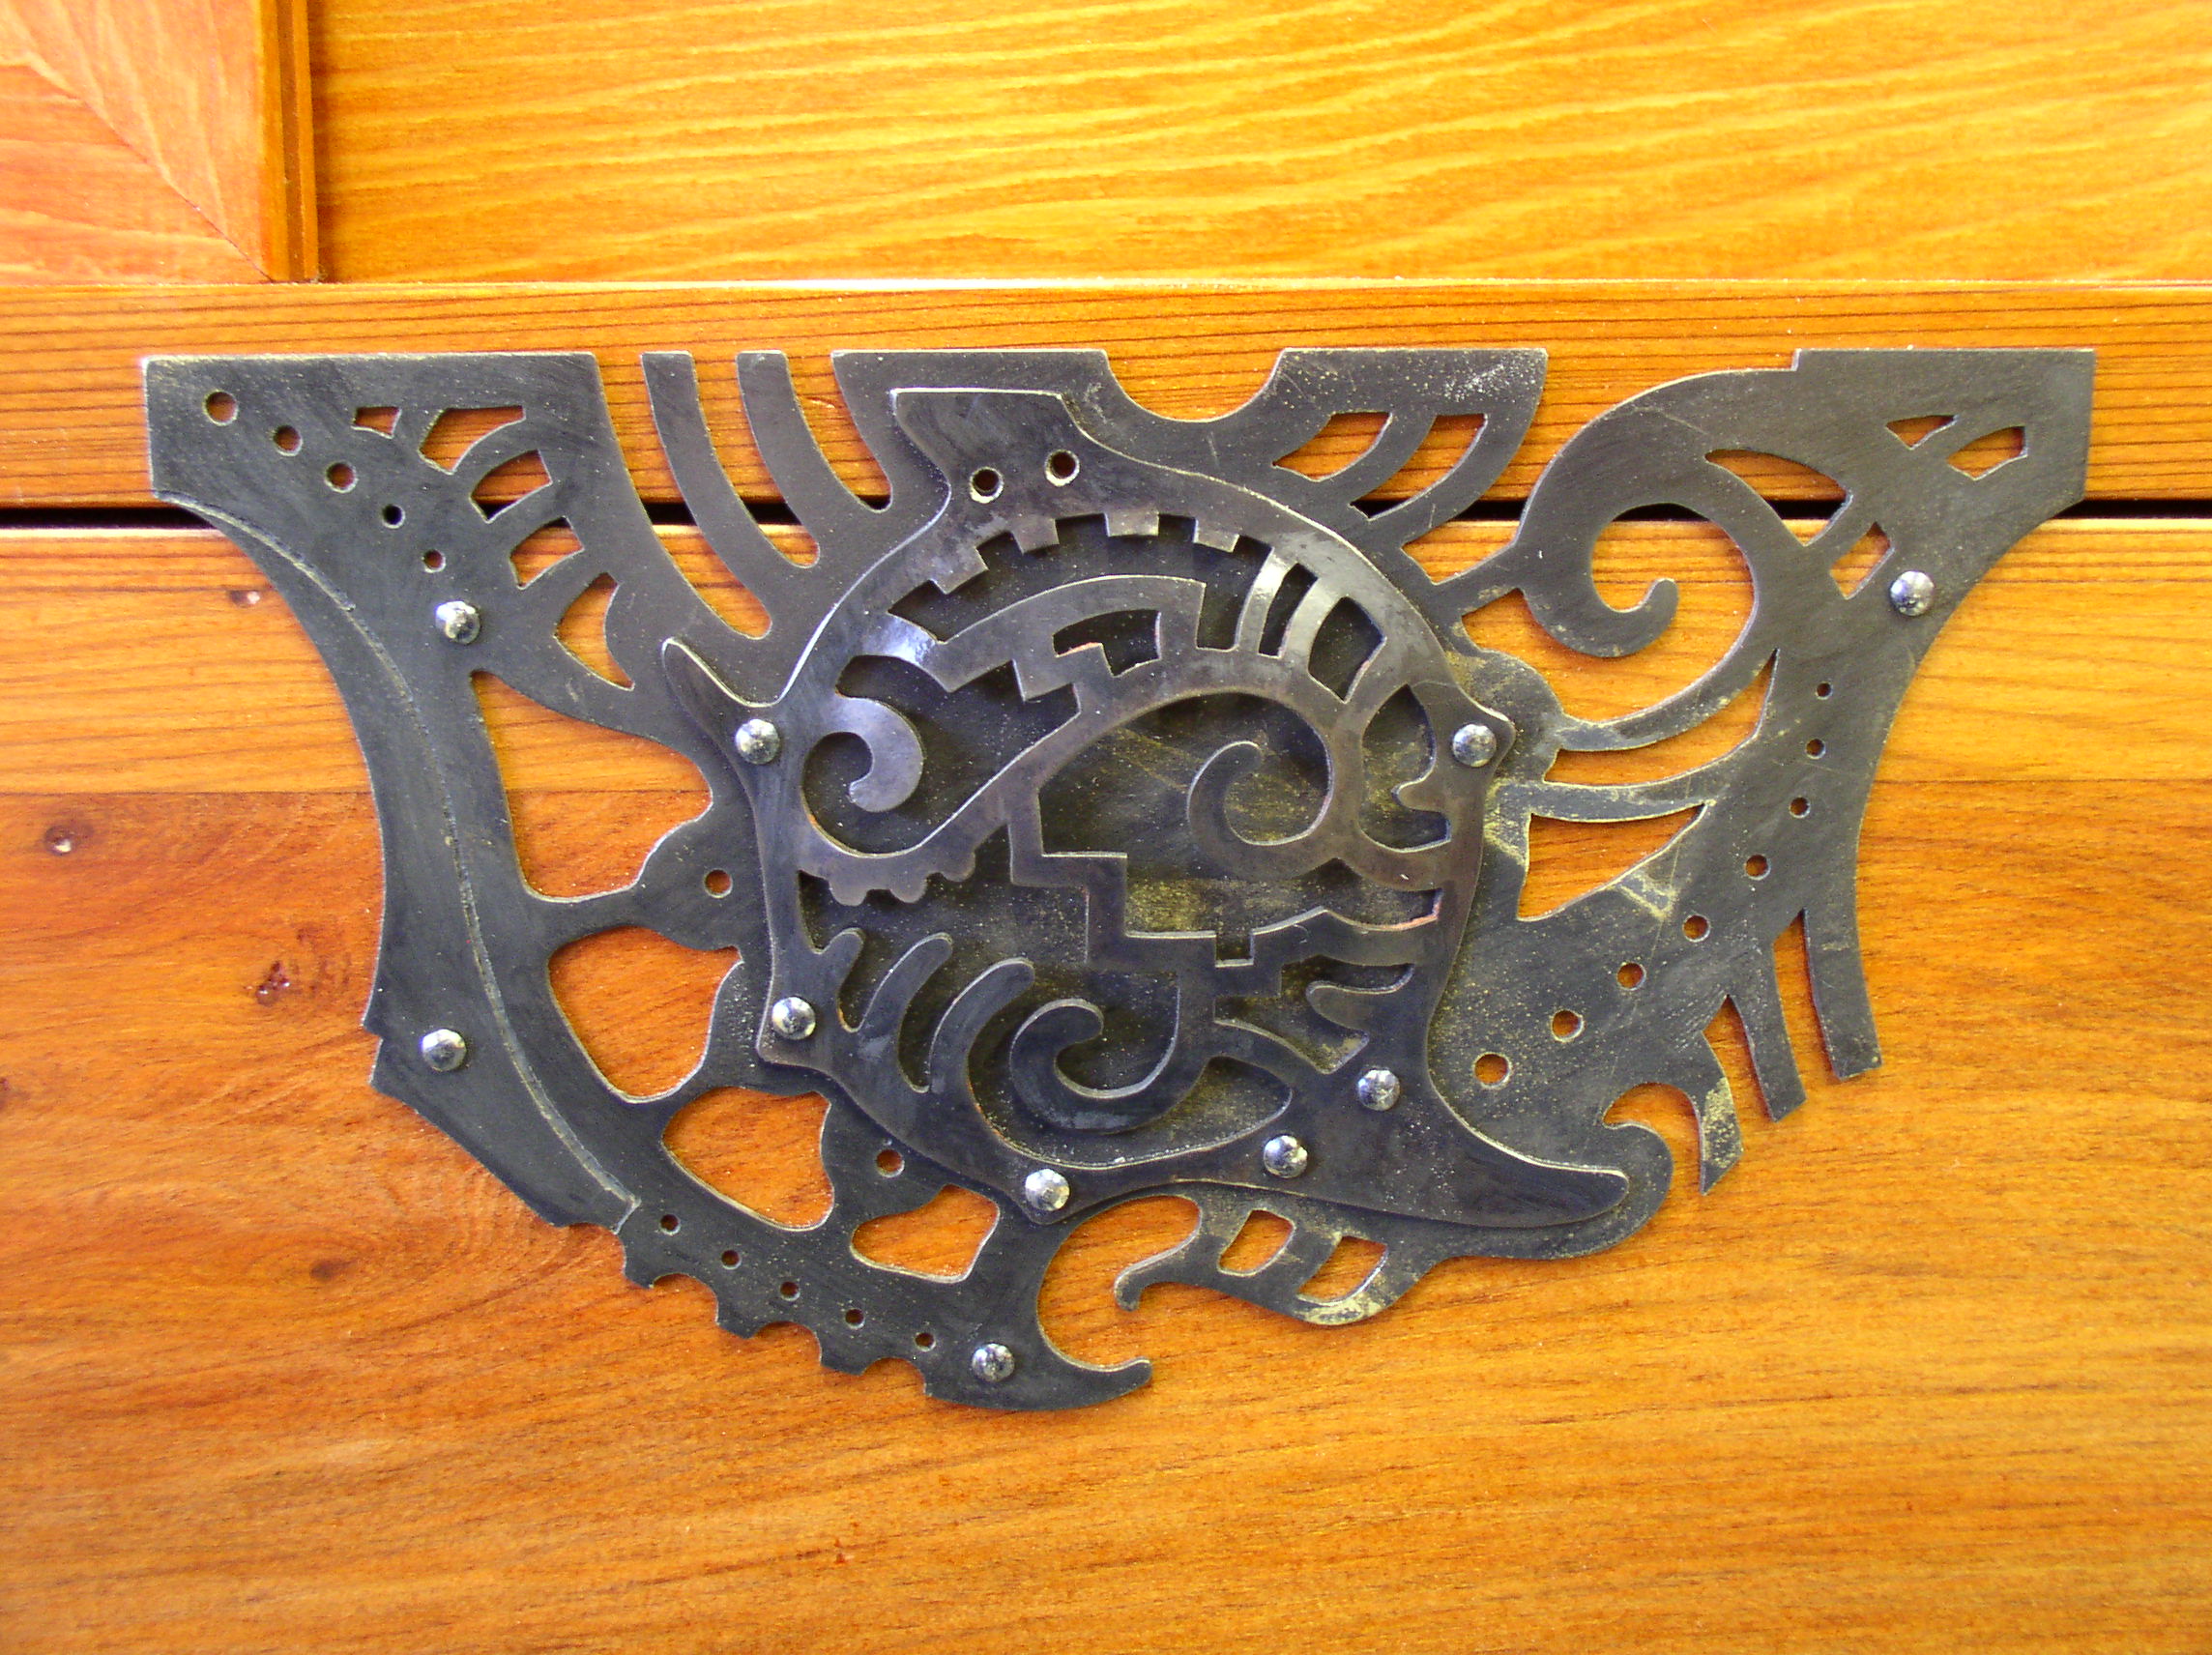
 Once the designs were worked out I transferred them to the sheet brass that I had painted with flat white paint so that it would be easy to see the patterns that needed to be cut out. Each flat piece was cut out using a jeweler’s saw with holes drilled in areas that were not accessible to the outside edges. Some parts of the design are a sequence of holes of increasing sizes that were cut out on the drill press. There are also areas of several layers of brass and areas with curved out sections that were pounded out in carved wooden molds. After the pieces were cut out they were cleaned up with needle files and polished.
The Hinges were made by cutting out the sheet brass then wrapping the knuckle sections around a brass rod.
The Process for Creating the Cast Handles
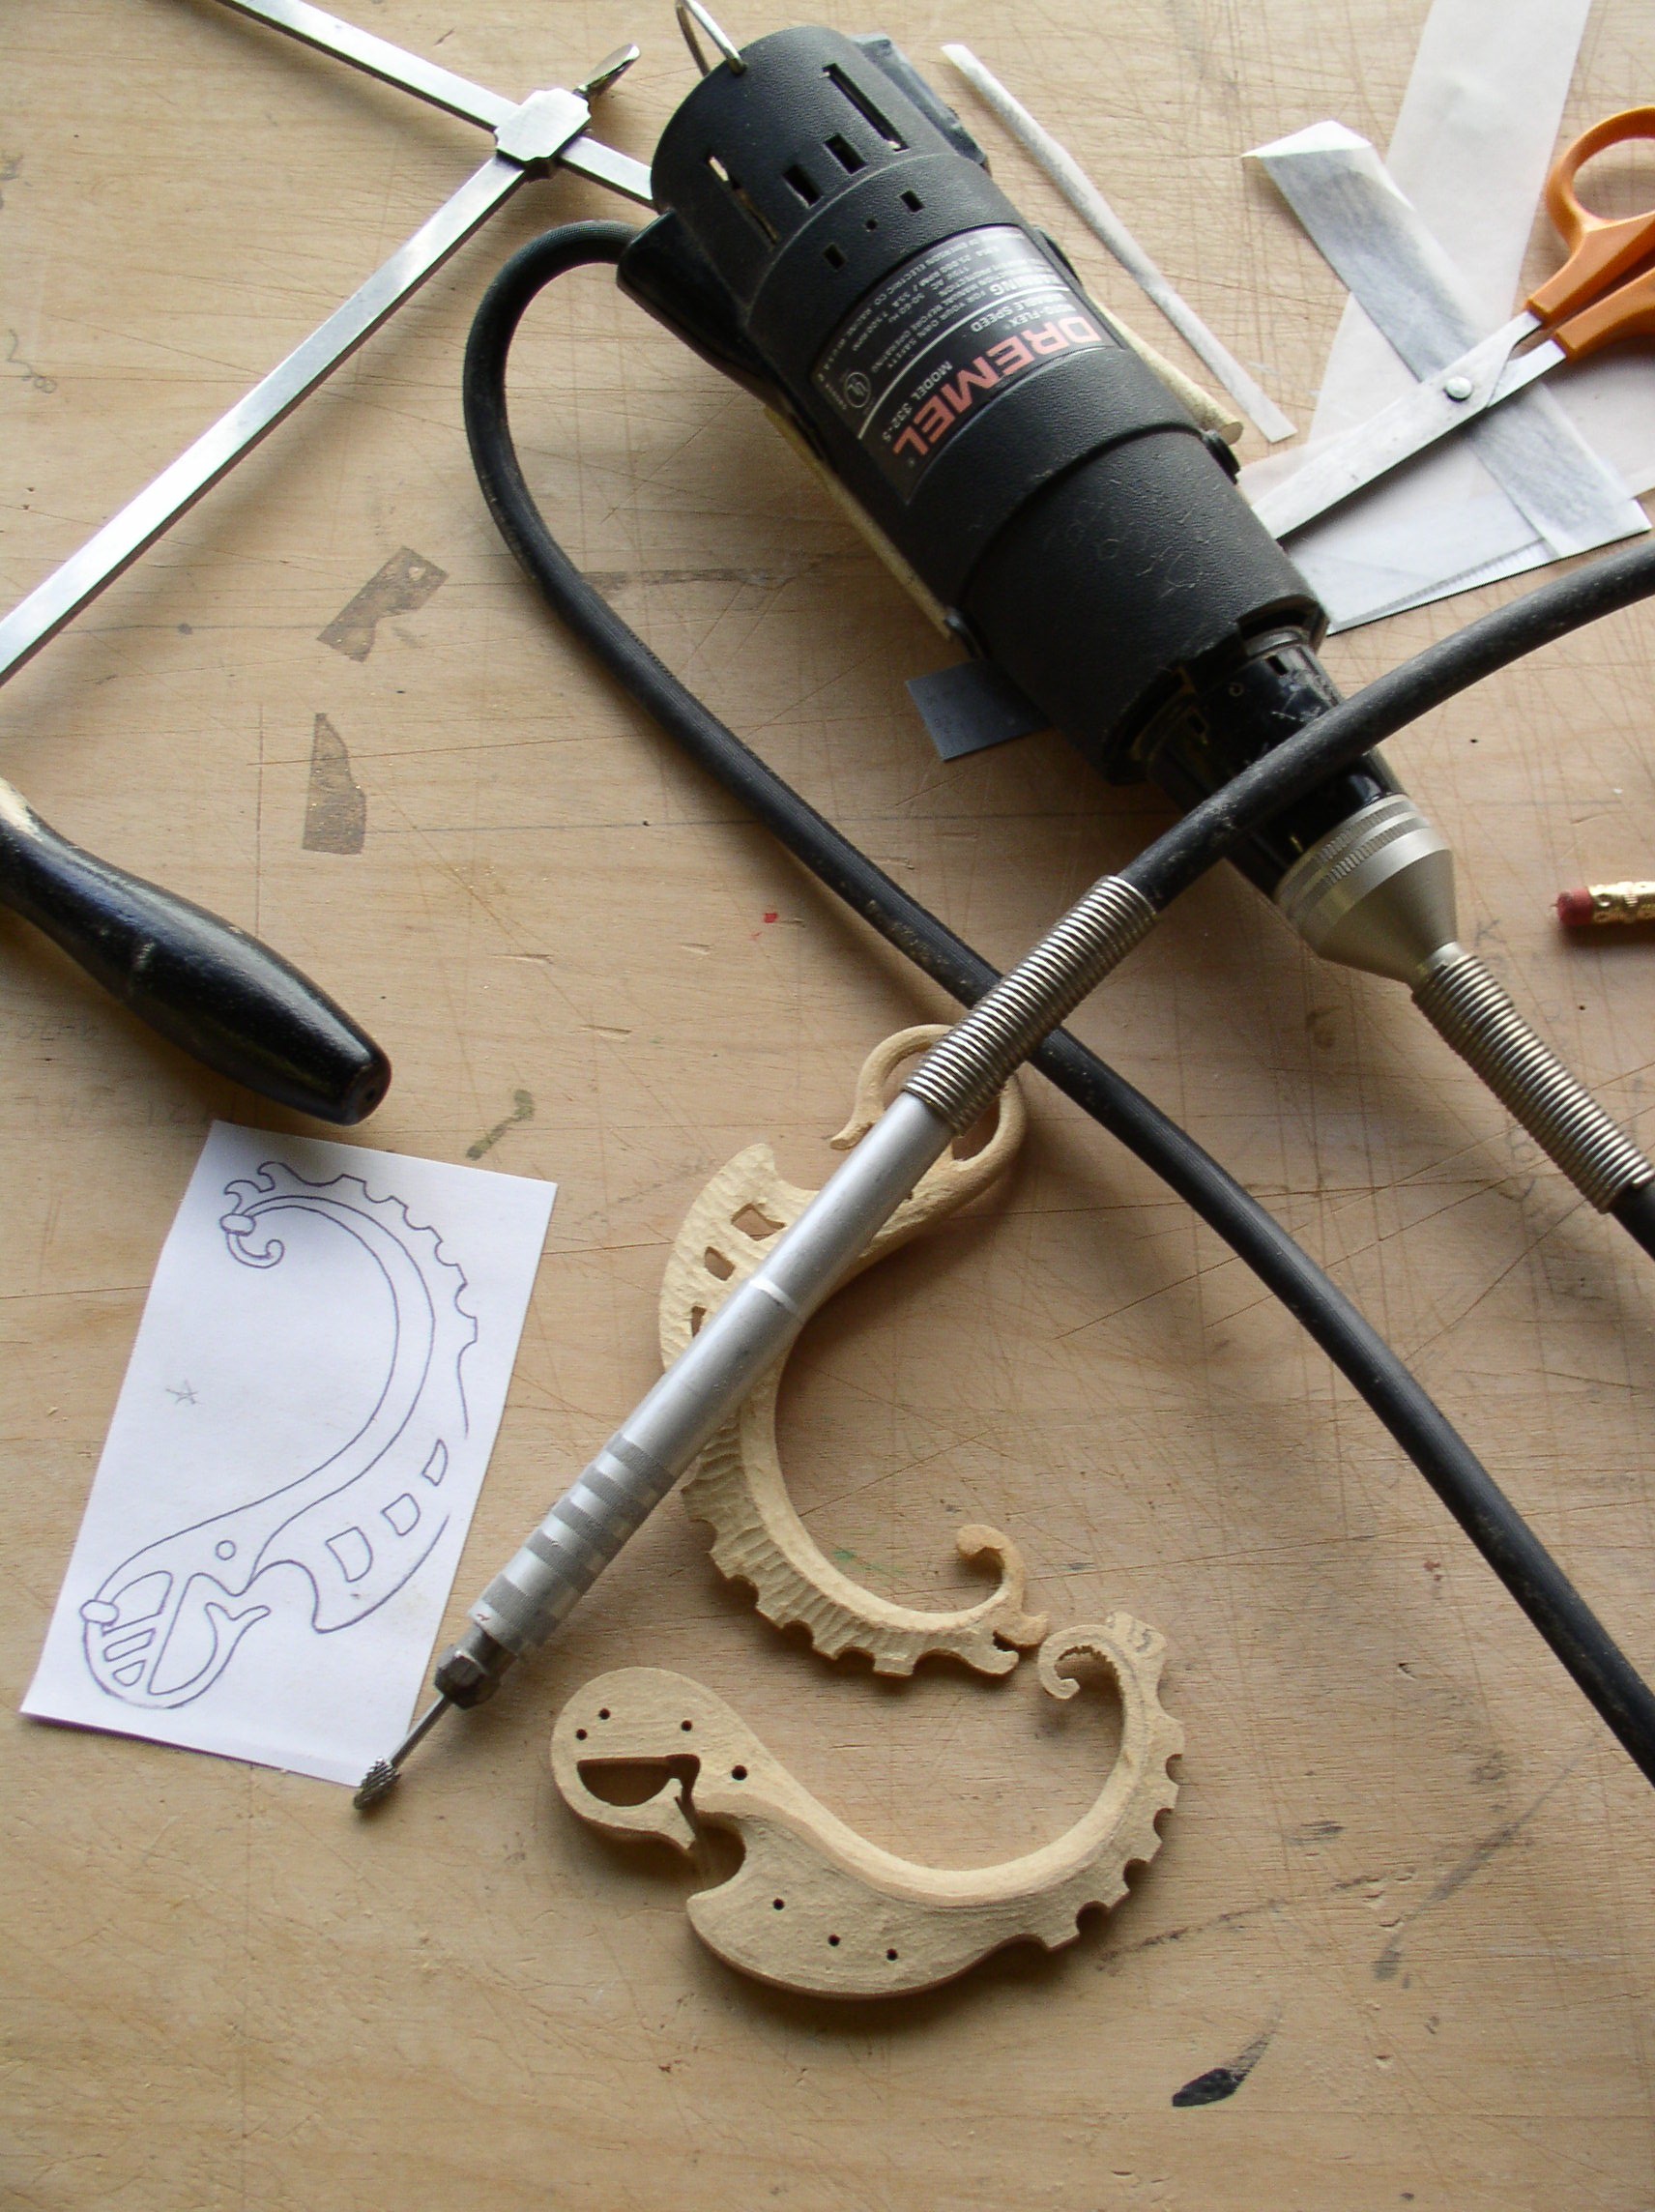
The shape I came up with for the handles was traced onto 1/2″ MDF then roughed out with the bandsaw and the jewelers saw then shaped with a Dremel. MDF makes nasty dust, so I made sure to wear my respirator, but the nice thing about making master shapes in MDF is there is no grain, so you have more control over where your cutter gets pulled as you work.
I made one, then decided it was too big, so I scaled it down a bit and made another.
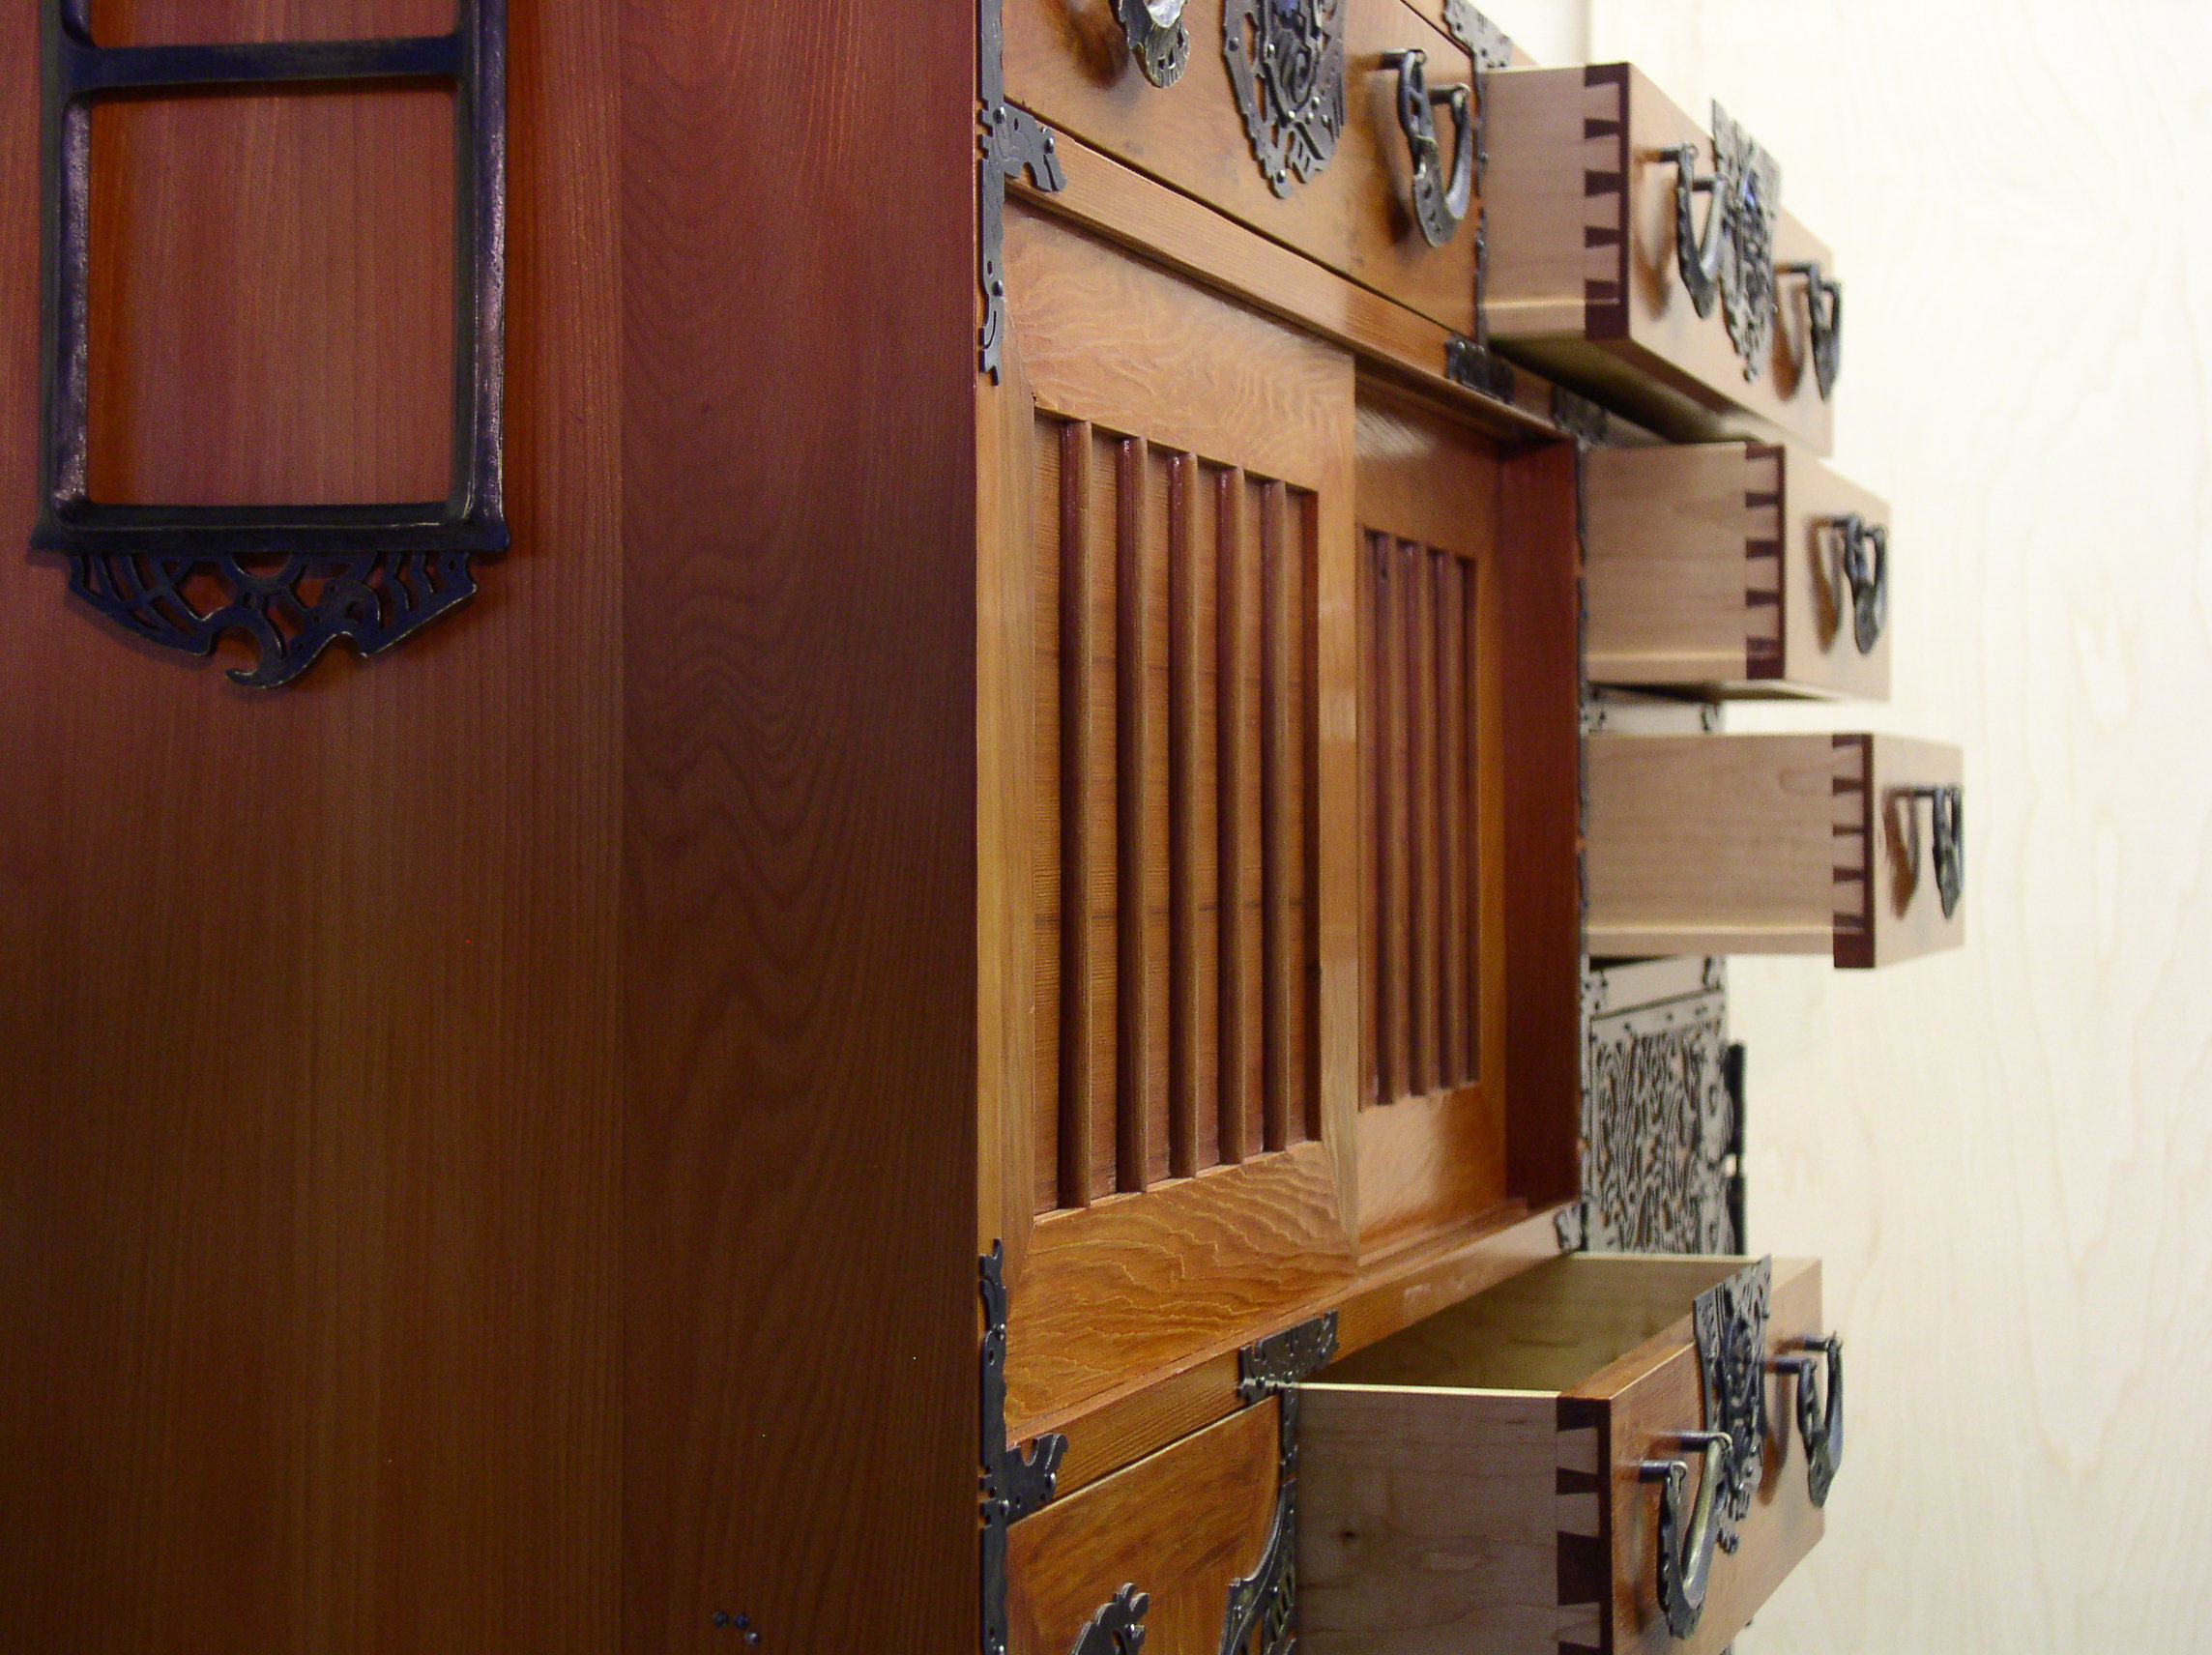
 The side handles got cut out of MDF also. Traditional tansus had side handles so that the furniture piece could be moved. The handles were swung up and a beam was slide through each side handle and two people could carry it. My side handles are decorative rather than strong enough to support the weight of the cabinet.
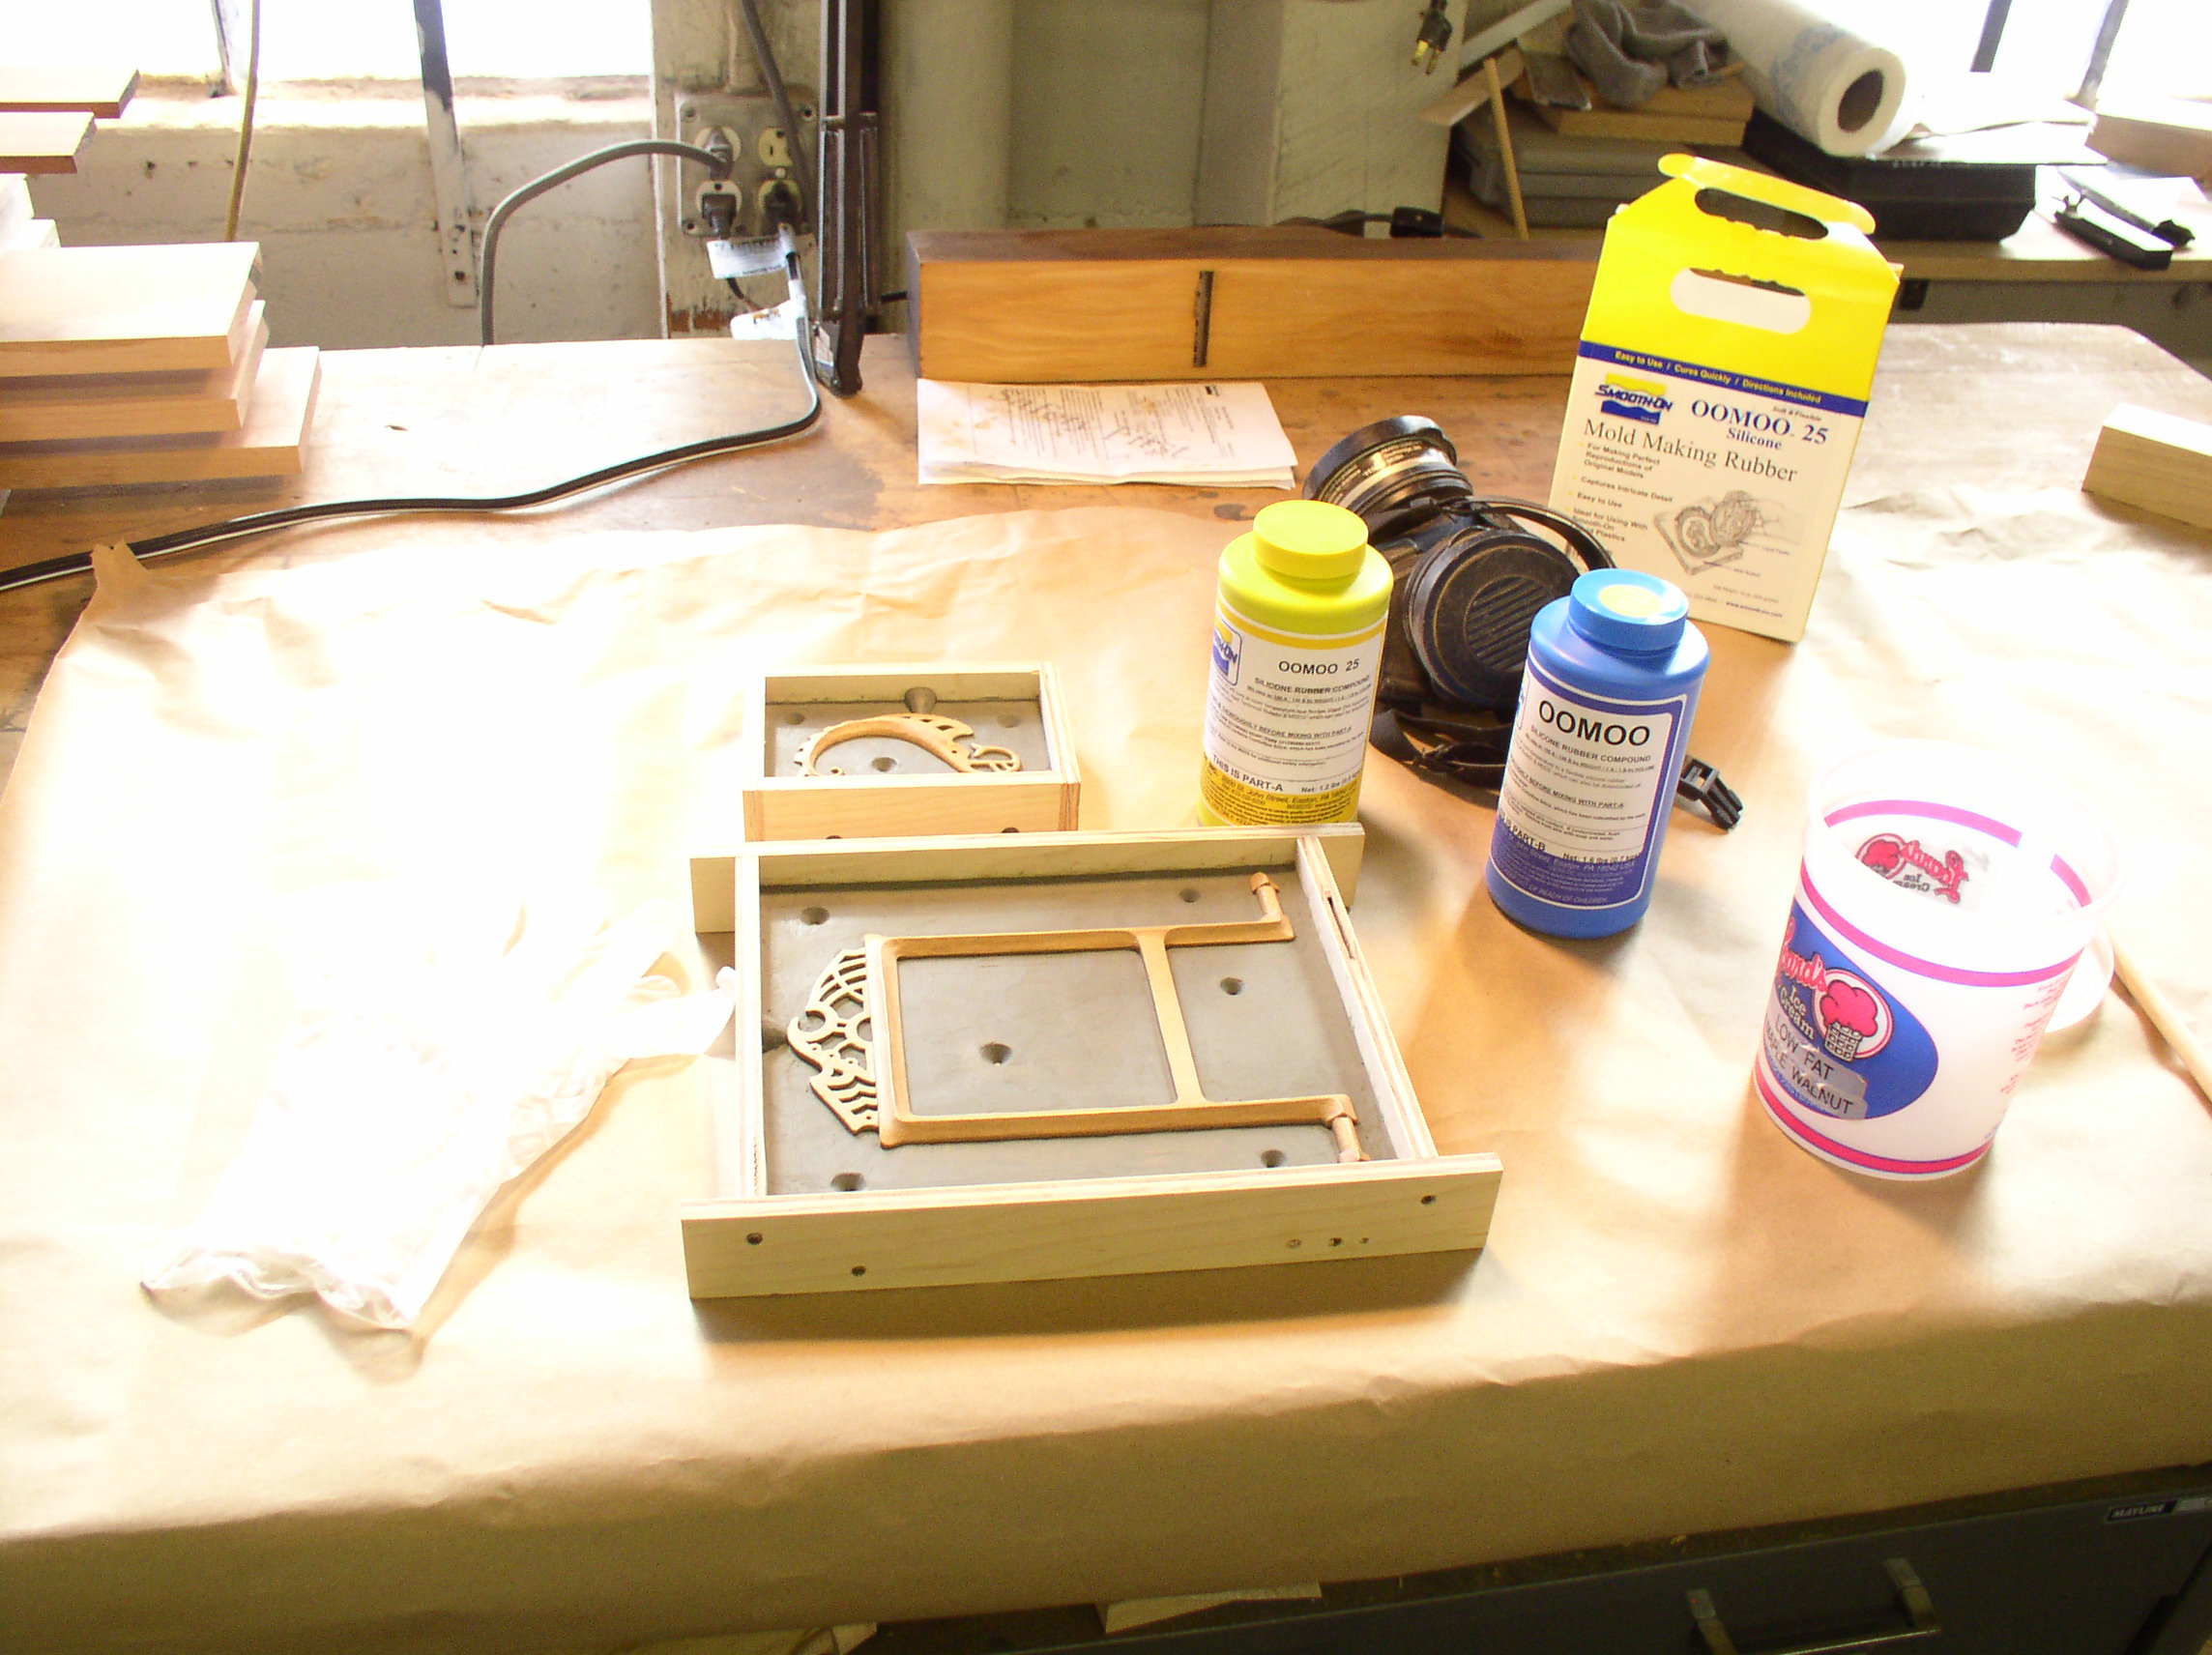
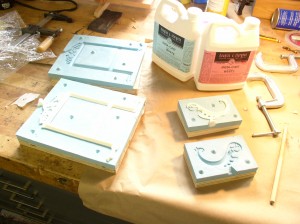
The MDF master handles were then cast in a two part silicone mold material. Before I did this I sprayed the handles with shellac so they would be less porous in the molding process. I used a brand of silicone casting material called Oomoo 25 by Smooth-On. The master handle was half imbedded in plasticine clay with a frame around it and a couple of registration bumps as well as a sprew (a jeweler’s term for the point in a mold where the ultimate casting material is poured into the mold). Next the silicone was mixed and poured into the mold. This is another case where my respirator was very important. Be wary of any two part mix material. Read the instructions carefully and protect yourself. I believe I used some spray on mold release to make sure parts do not stick. Check the mold material instructions.
 After the silicone mold material sets up the form and the plasticine clay is removed. The frame is reinstalled, mold release is applied if necessary and the other half of the mold is poured.

The frames were taken off the molds and the MDF handles were removed.
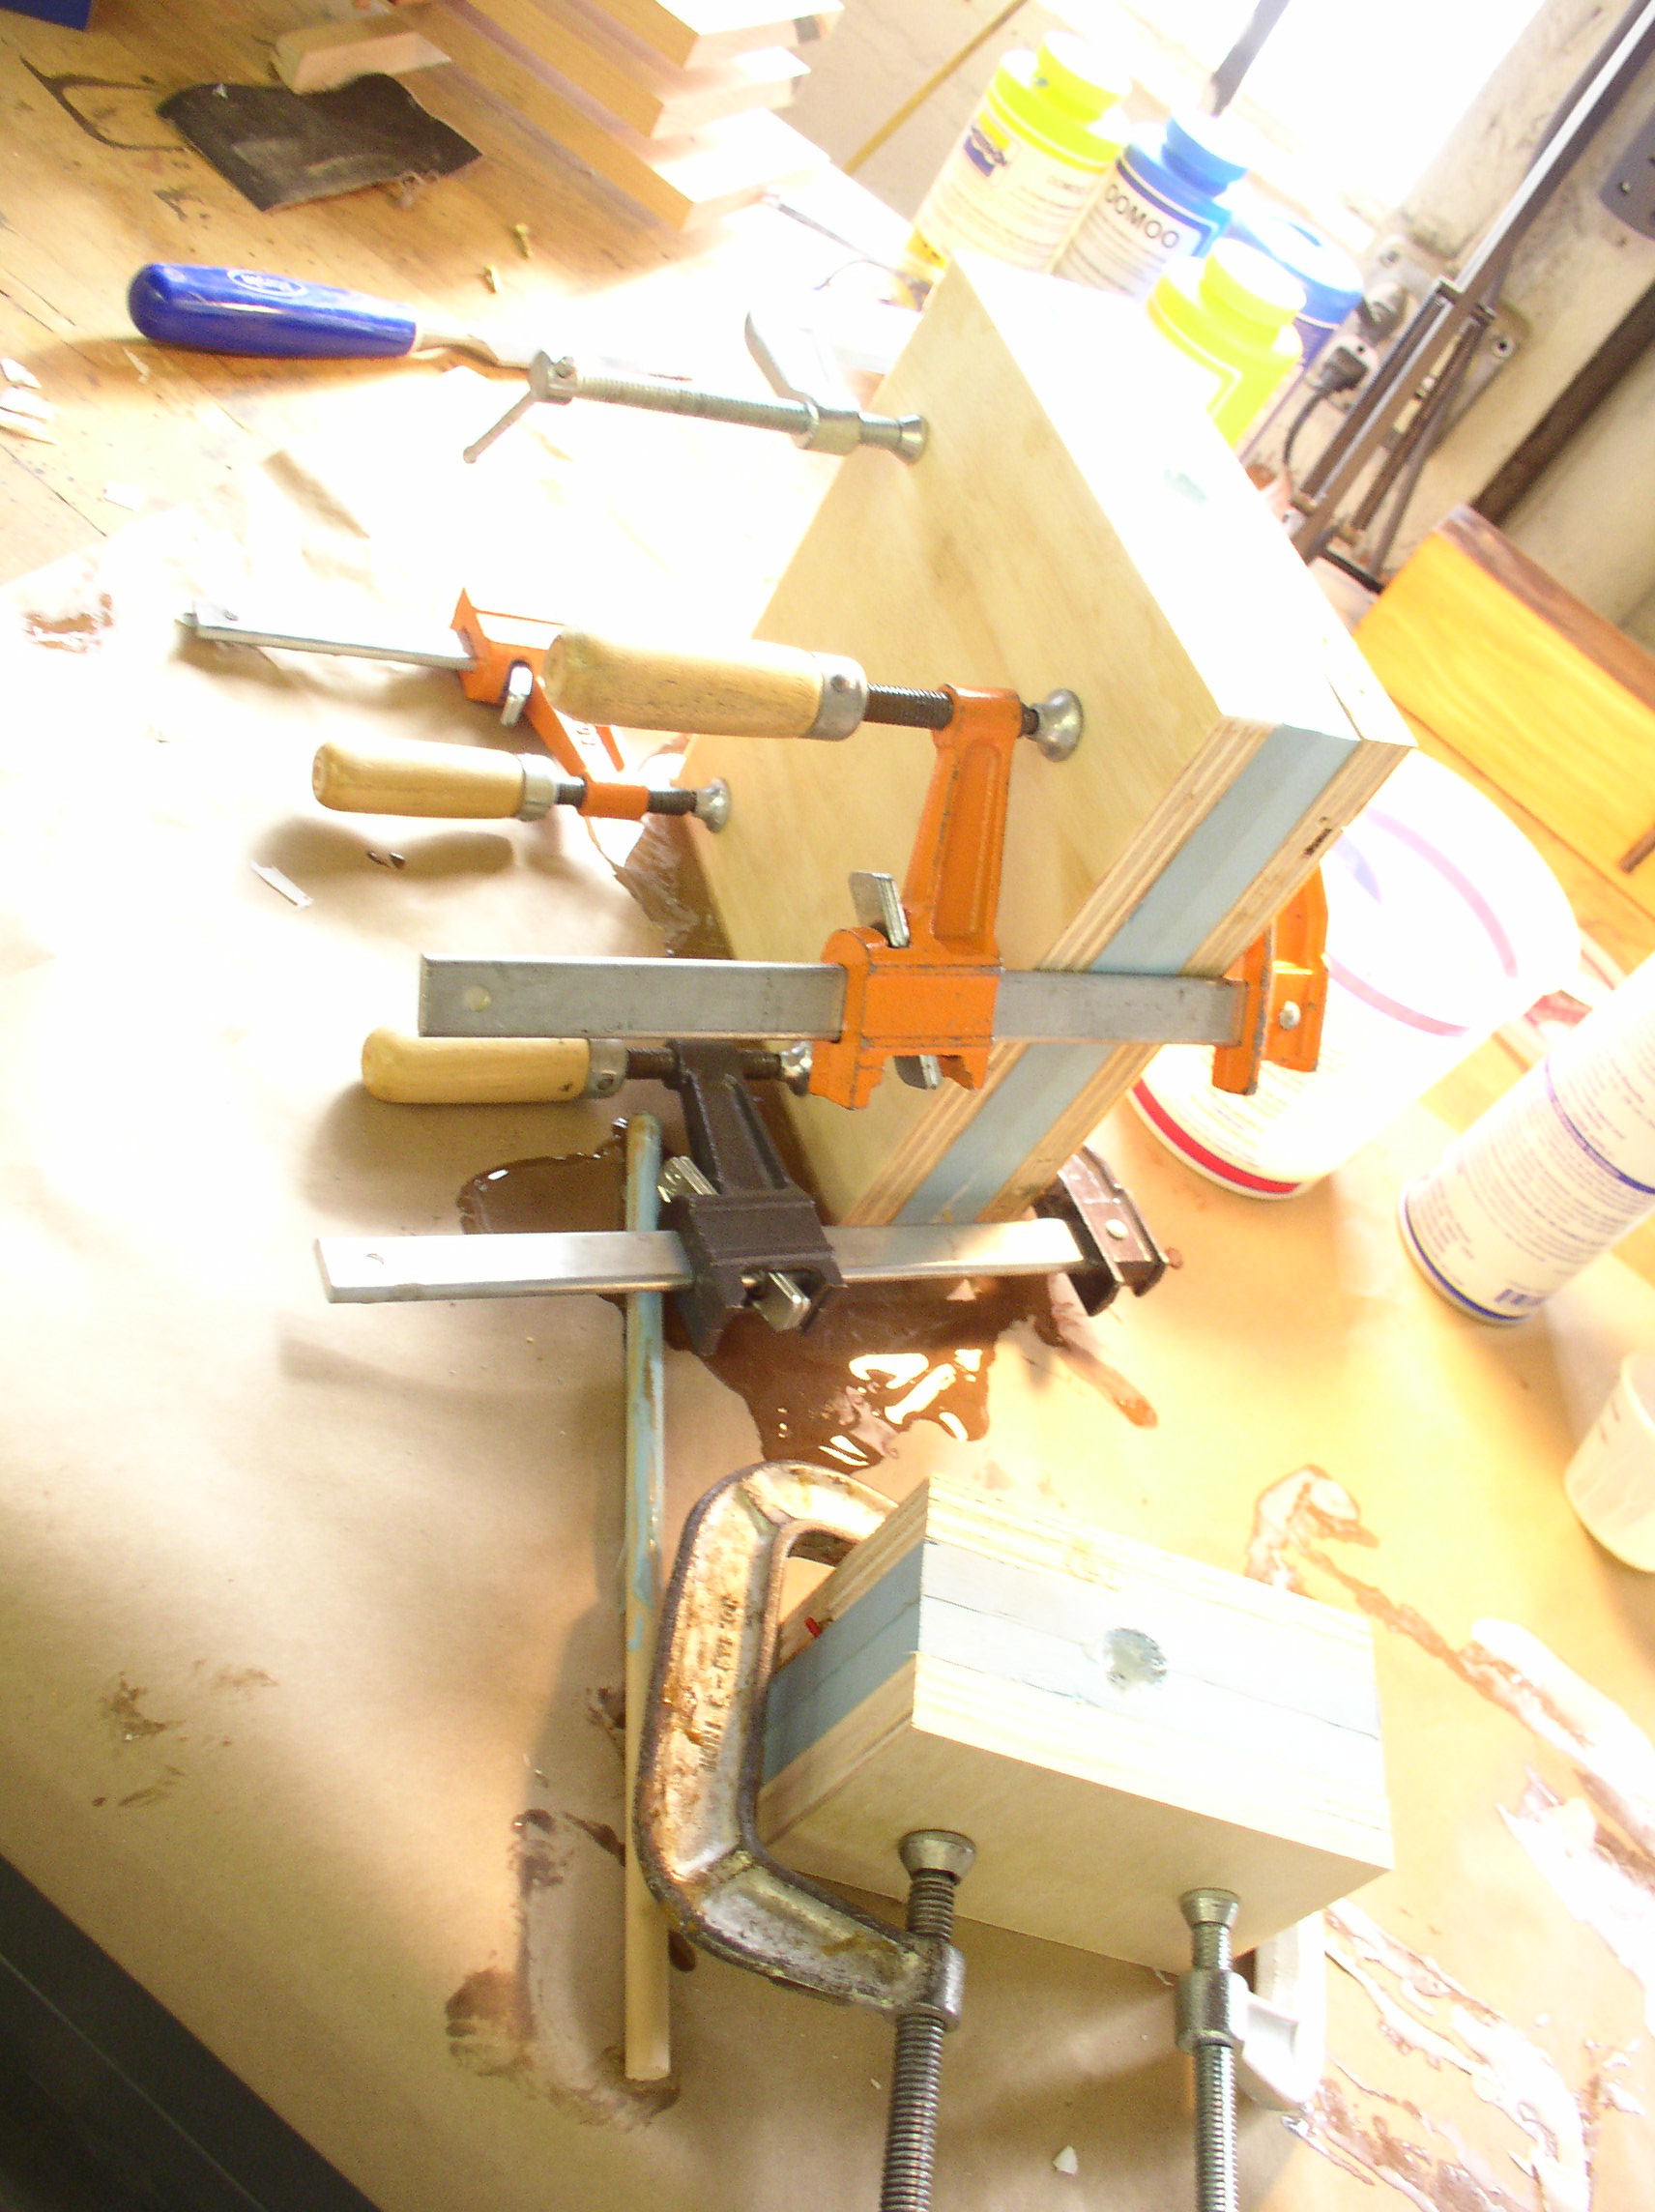
This whole process was so that I could make multiple master handles to send to the foundry to get the handles cast in brass. If I had sent the original MDF handles there was the possibility that they would get damaged and I would have to make a new master. To make multiple masters I poured a two part plastic material into the molds and let that set up. Plywood blocks were used behind the silicone molds for this stage where I clamped the two mold parts together and poured in the plastic. It takes some experimenting to get this right. At first I didn’t get the plastic to flow through the whole handle area. I had to add some tiny air vents so that air doesn’t get trapped in the mold and keep the plastic from flowing through-out. I took a utility knife a cut a small channel into the silicone. The plastic casting material is very thin and will flow out all over and create a big mess, so protect surfaces. also have the vents go up to the top of the mold otherwise you will have a pool of liquid plastic flowing out before it sets up. The two part plastic I used was Douglas and Sturgess Intra-Cast in white. They had the Oomoo and mold release also.

 Once the plastic is set up the sprews get cut off and they get cleaned up with small files. Now they are ready to be sent out to get cast.
I created hardware to hang the handles by using brass tubing that I tapped for a mounting screw that goes through the drawer from the back and then I cut the tube to create a tab on the front that I bent around the finished handle. All the brass pieces were blackened with Jax brass blackener which gave a mottled black finish that I liked.
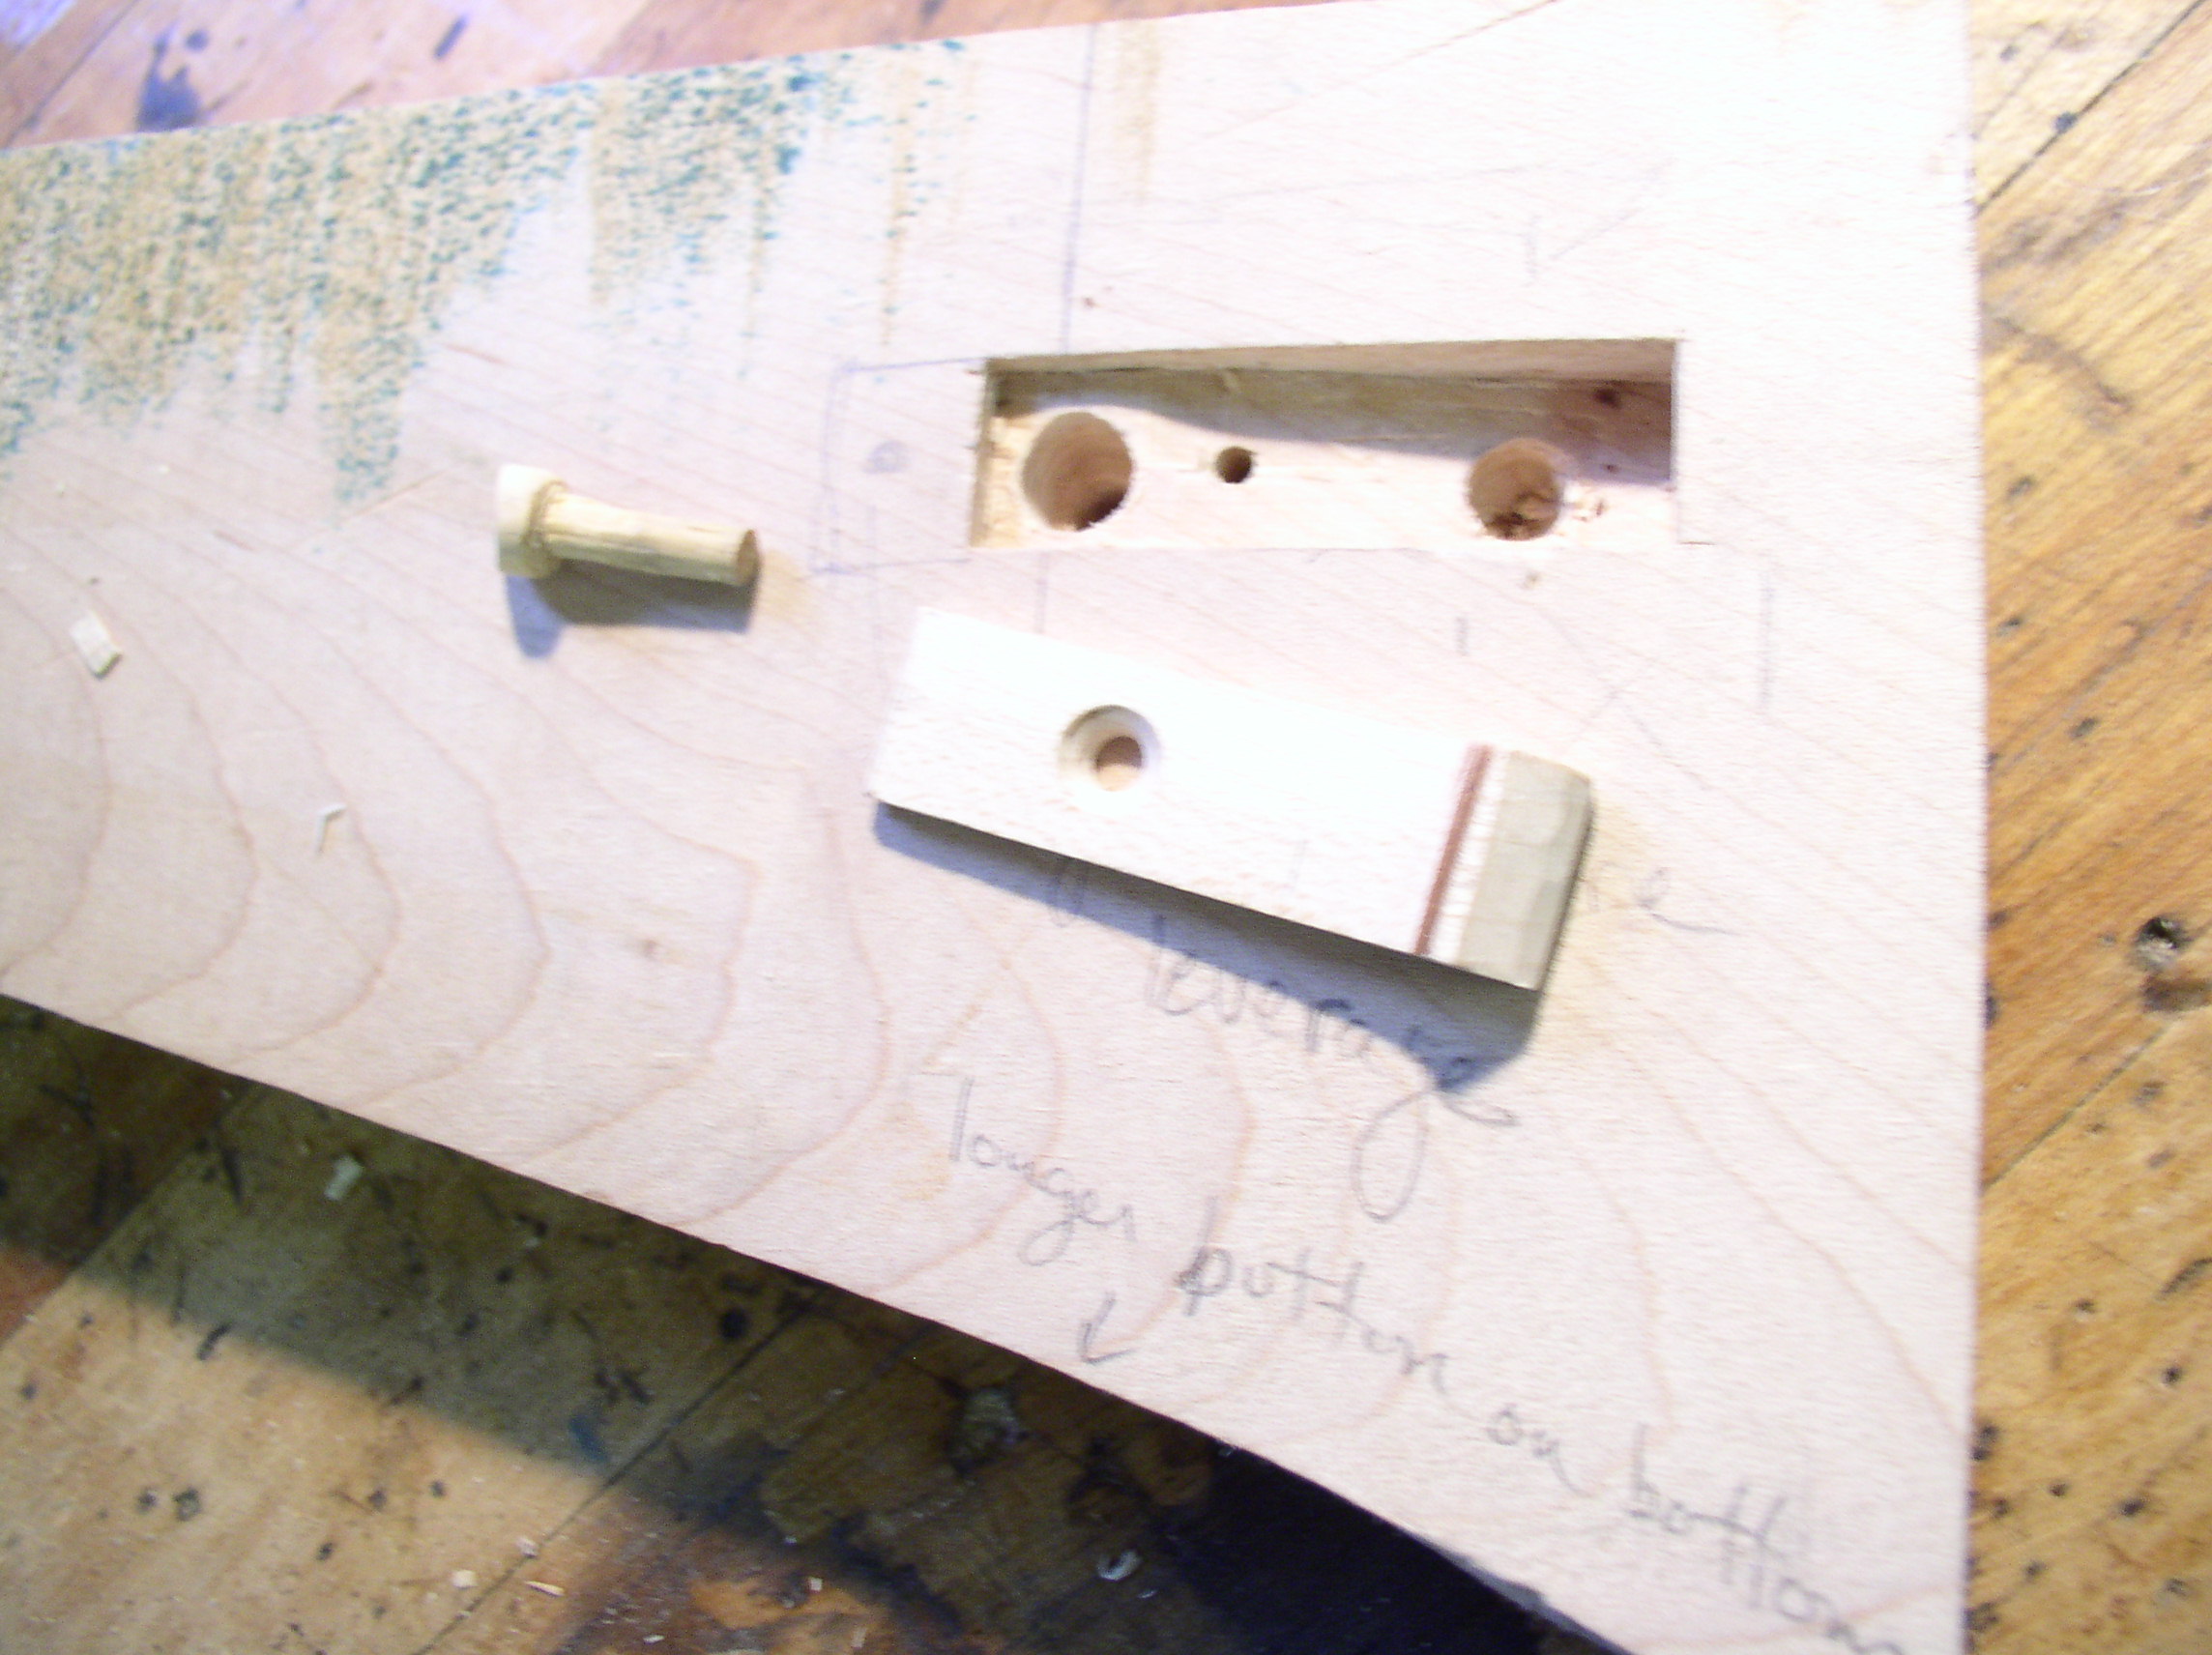
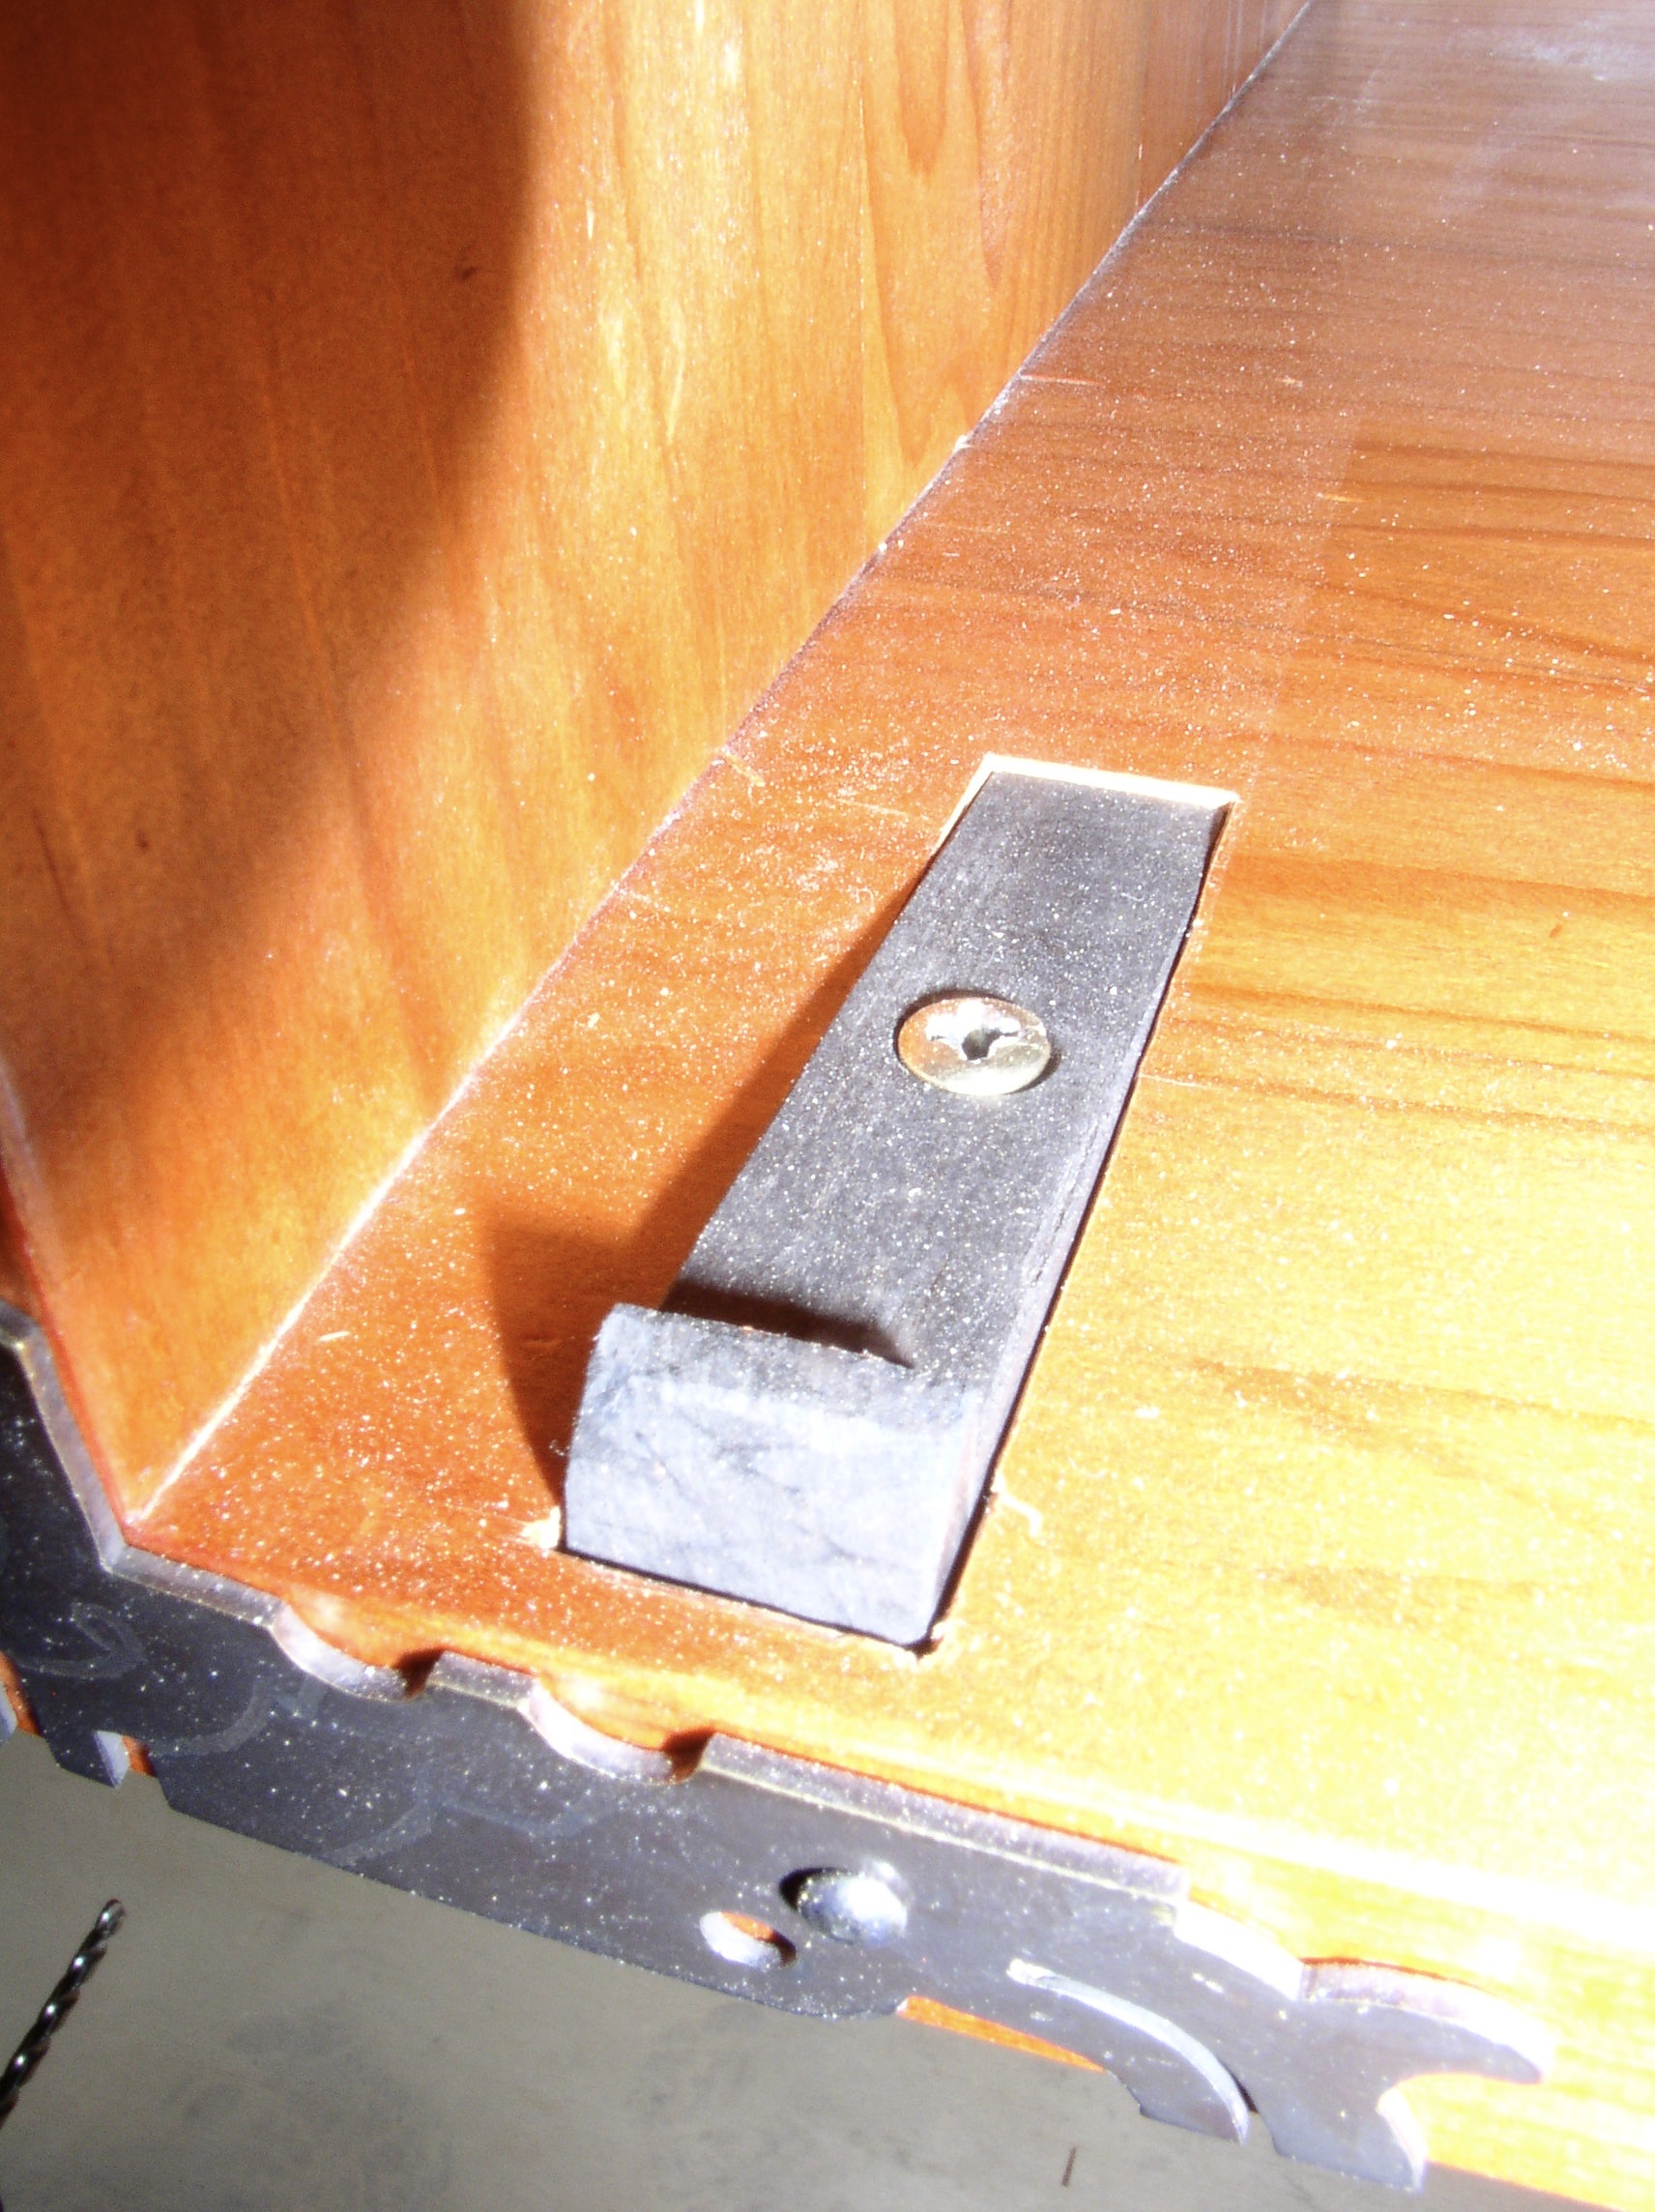
When I had the hardware attached I realized that I hadn’t figured out the handles for the two lower doors! I had the design just the way I wanted it and I had no way to add a handle to the front of those doors. So, I decided there needed to be a hidden catch. I ended up putting a button under each door on the bottom of the cabinet with a spring catch, so when I push the button the door pops open.
Additional photos:
Leave a Reply
You must be logged in to post a comment.